

As you go to the entrance to Kero Sewers, Mallow tells you about a Monster called Belome that his Grandfather warned him about that makes his lair deep in the sewers. Check to see if you are in full health before you go into the entrance.
Enemies in the Area
| Enemy type | Name | Hitpoints | Experience | Coins | Item drop %5 | Item drop %25 |
| Mob | Goby | 40 | 3 | 2 | Mushroom | |
| Mob | Hobgoblin | 50 | 4 | 3 | Pure water | Pure water |
| Mob | Pandorite | 300 | 20 | 30 | Flower jar | Flower jar |
| Mob | Rat Funk | 32 | 2 | 6 | Able juice | |
| Ghost mob | The Big Boo | 43 | 2 | 2 | Honey syrup | Honey syrup |
| Ghost mob | Shadow | 85 | 3 | 3 | Pick me up | |
| Boss | Belome | 500 | 30 | 40 |
The recommended level for Kero Sewers is level 5. Continue using timed attacks and timed defense when facing groups of enemies.

Focus on one enemy at a time or let mallow use thunderbolt while let Mario focus on enemies with high Hitpoints. Most mobs in the area can get wiped out in 2 turns with Mallow casting his AoE spell twice with the exception of ghost mobs and the Pandorite.

You should also focus on killing hobgoblins since they drop Pure water which is very effective against ghost monsters and can be sold in the shops for 75 gold coins.
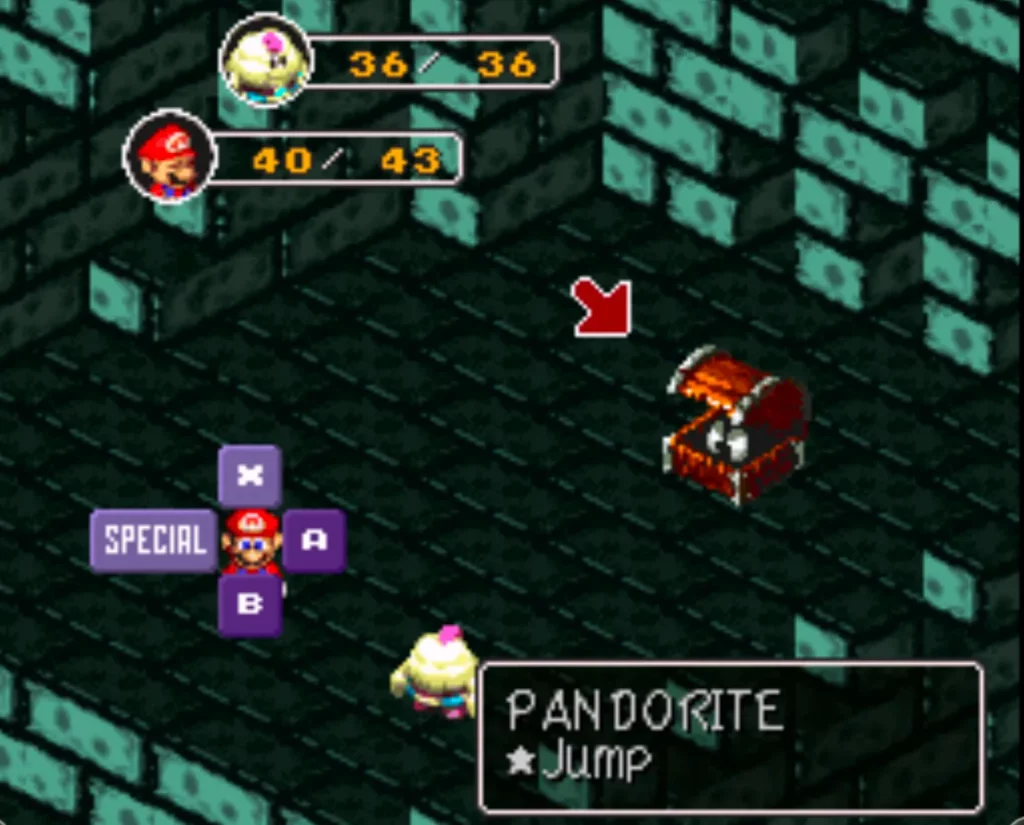
Cut down Pandorite’s Hitpoints by using Mario’s jump skill. Let Mallow use his Hp Rain support skill to replenish your Hitpoints when you need to until you defeat it.
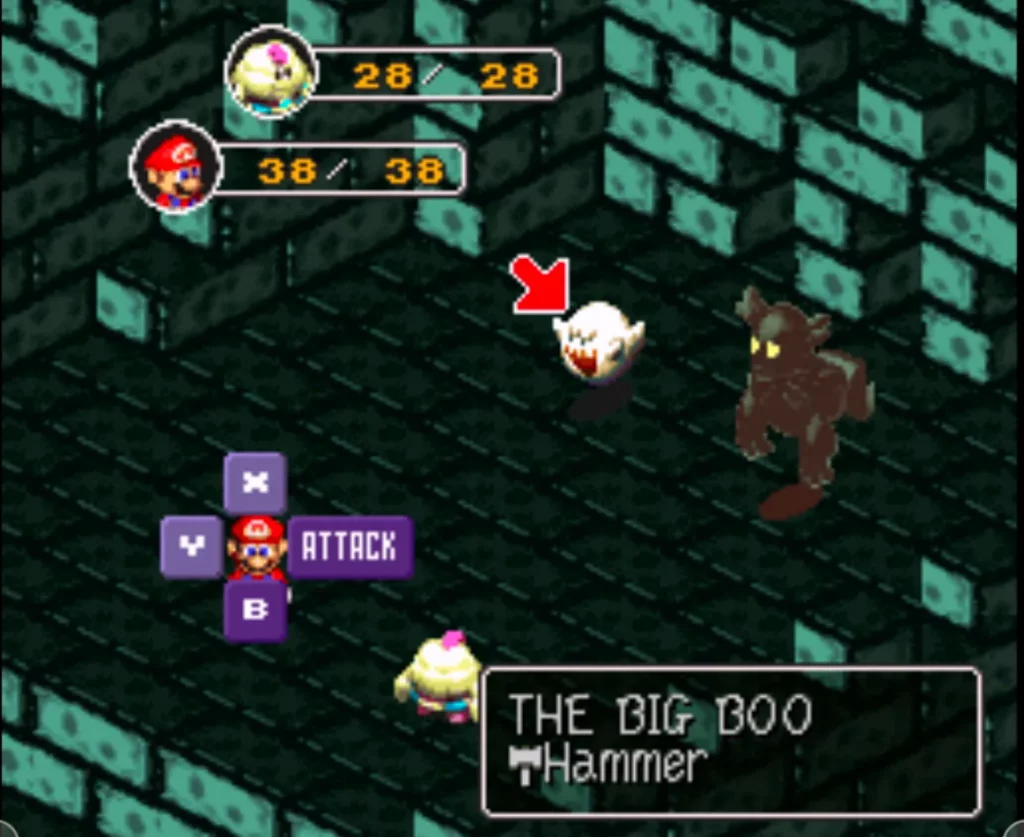
As for Ghost mobs, Don’t waste your Pure water items on them since they cost 75 gold when selling them at item shops. Basic attacks deal the most damage to them so focus on one enemy at a time while prioritizing on the big boo since it takes only one timed hit to kill even for Mallow.
Navigating Kero Sewers
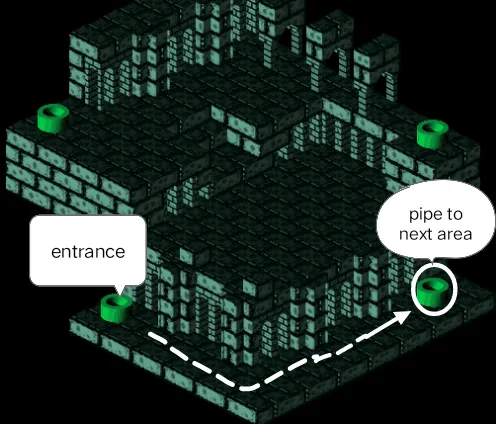
Area 1

Look for the save point as you exit the pipes. After saving your game, jump into the water and make your way to the next pipe at the top right of the area. Hop on top of it and press down to travel through the pipe to the next area.
Area 2

Once you exit the pipes, go towards the next pipe to your right. Hop on top of it and press down to transport you to the next area.
Area 3
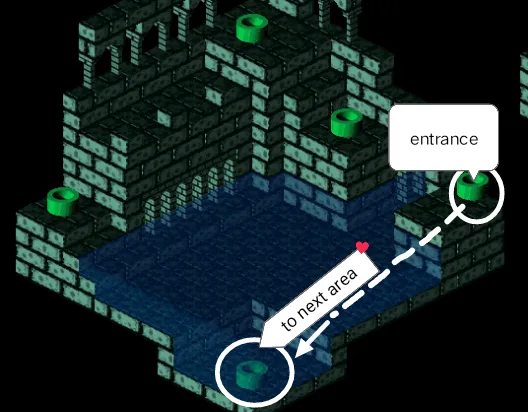
Hop down from the pipe and follow the corridor to the next pipe. A mob of ghosts will be guarding the area so defeat them to earn yourself a pure water and hop on top of the pipe to transport you to the next area.
Area 4

Head down past the arches and loot the jump box at the edge of the map to initiate the fight with the Pandorite.
Trueform Pin

Head down past the arches and loot the jump box at the edge of the map to initiate the fight with the Pandorite.

After slotting the trueform pin, Stand on the middle step of the stairs and jump towards the platform above. There is a secret stash of 50 gold coins that you can get from the now empty jump box where Pandorite has been hiding. To get them, go back to the pipe you came out of in this area and go back again. You have to exit the area completely for the stash to become available.

Make your way down again to where you fought Pandorite and the jump box will be restocked. Jump and loot the 50 gold coins and make your way up the platform again and head to the left side of the screen to loot the jump box containing a flower tab and make your way to the pipe at the top right of the map to take you to area 5.
Area 5

Grab the Star Power Up inside the jump box and bowl over the group of Rat Funks below you. Make your way up the platform towards the next pipe leading to area 6.

Before your star Power up runs out, Don’t forget to bowl over the ghost mob located at the top right as you climb the platform. After clearing the enemies in the area, Head over to the pipe to take you to area 6.
Area 6

After exiting the pipe, jump to the top ledge and fight the funky rat guarding the edge. Afterwards, jump down and use the pipe at the bottom to take you to the next area.
Area 7

Make your way to the green flood switch above you. Take the stairs to the right to reach it. There will be a trampoline at the top of the steps that you can use to make your way back to the entrance of the sewers if you need to. After stepping on the switch, Make your way back to the pipe that you came from and enter it again.
Area 8
With the water drained in this area, Move your way to the bottom right of the map. The pipe that was previously submerged can now be accessed. Hop on top of it and make your way to the next area.
Area 9
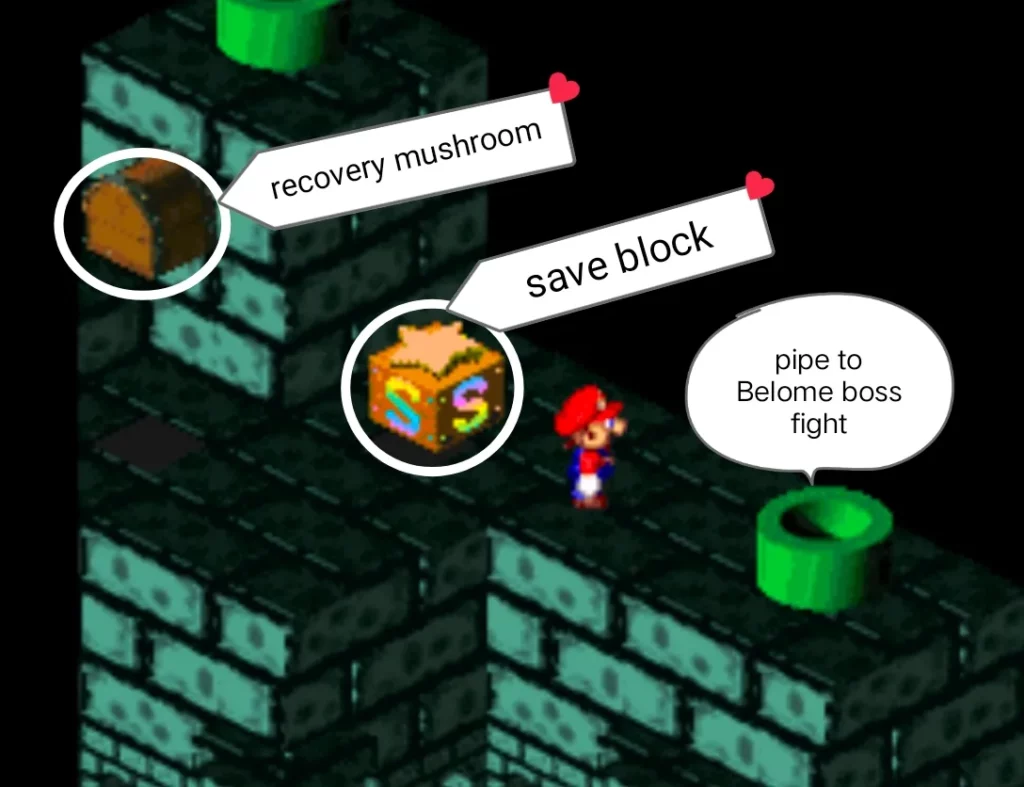
Jump down from the pipe and make your way to the top right side of the map. Grab the recovery mushroom from the jump box and save your game. The pipe on the right will lead you to the Belome Boss fight so make your preparations before entering the pipe to take you to the next area.

Open your inventory and make sure that Mario has the Trueform pin equipped. This will nullify Belome’s Morph skill that will turn you to a scarecrow for about 2 turns. In scarecrow form, you cannot deal any attacks and will receive higher damage from the boss until you morph back.
As for Mallow, use the wake up pin accessory to nullify Belome’s sleep skill. This puts a character to sleep for 2 turns so having this slotted on Mallow will be essential since the Boss tends to target him with the skill while Mario gets targeted with the Morph skill.
When you have made your preparations, enter the pipe to take you to Belome’s lair to face him.
Boss Fight Belome
| BELOME | ||||
| Hitpoints | 500 | Experience gained | 30 | |
| Flower points | 30 | Gold coins | 40 | |
| Attack | 30 | Item drop | None | |
| Defense | 25 | Special attacks | Scrow funk Morphs to scarecrow | Sleep sauce Casts sleep |
The recommended level for the Belome fight is at level 6. Start strong by hitting Belome with your Super Jump or Jump attacks if you haven’t unlocked it yet. Let Mallow cast thunderbolt and be ready to let him use honey syrup when you fp gets low.

On the fourth turn, Belome will start using his skills on your party. He usually targets his skills on Mario early into the fight so have Mallow support him with healing skills and items in the fight.

When Belome’s has around 50% of health left, He eats Mallow which leaves Mario alone for the fight. Continue to damage the boss with your jump attacks until he spits Mallow out. When Mallow gets free, let him use healing items and skills and be ready to replenish the party’s Fp in preparation for Belome’s onslaught when he has around 25% health left.

As you near the end of the fight, Belome will start spamming his skills on your party. If you have the trueform and wake up pin accessory equipped in your group, you can ignore his attacks and let Mallow spam his thunderbolt skills to end the fight faster. Belome will stop the fight by saying that even if he lost the fight, Mario will not be able to stop the flood which is about to happen.

Belome leaves which immediately causes the room to shake. The area will then be flooded by the rushing water on the doorway in front of you and the force of the water pushes you out of the sewers to Midas River.
<<Return to Mushroom Kingdom Under Attack Walkthrough