

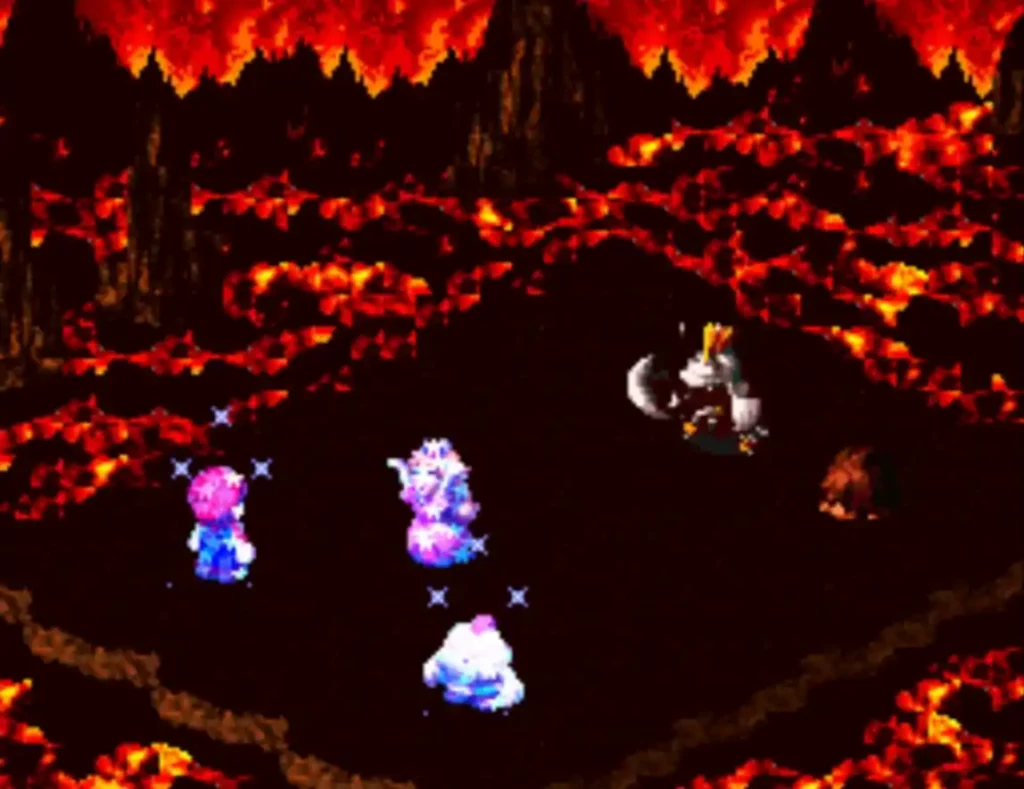
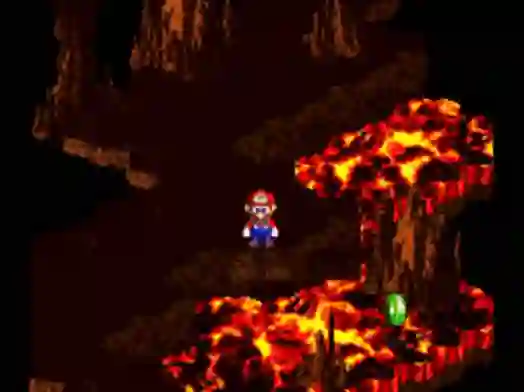
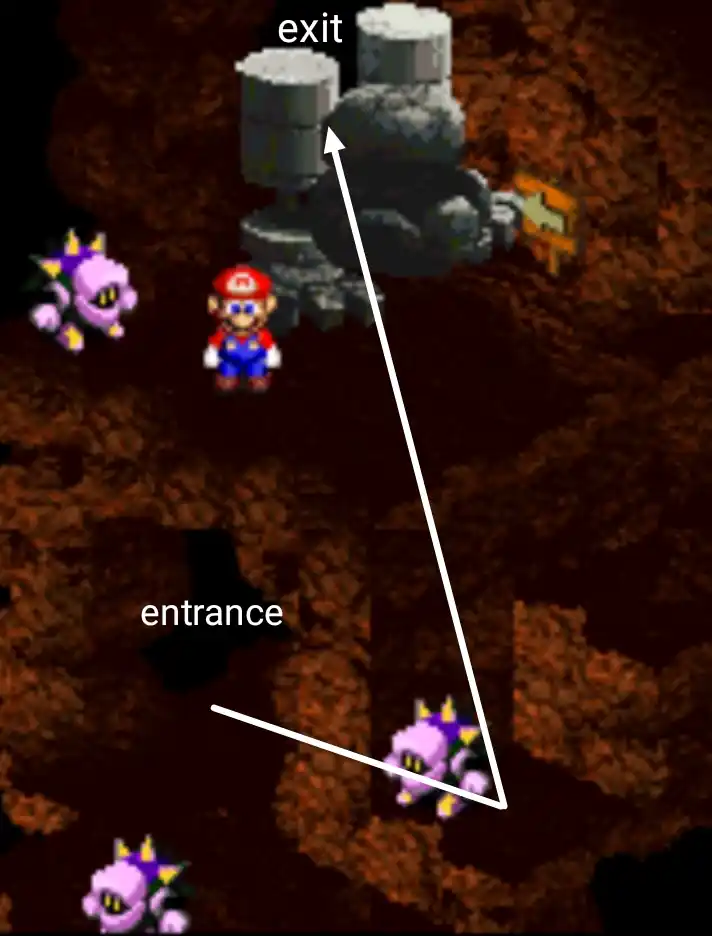
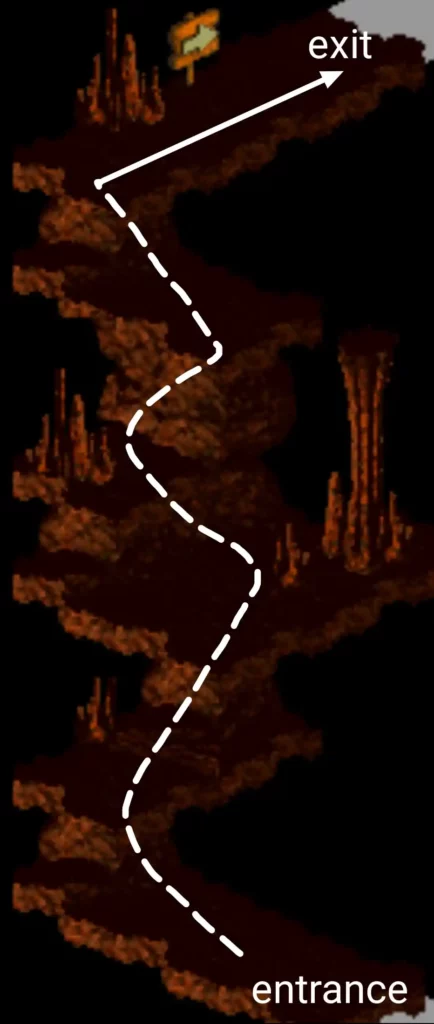
Mario falls off the edge and into the crater of Barrel Volcano. The first area on this level is a small room with a trampoline in the middle which can take you back to Nimbus Land and an exit located at the bottom left side of the room to take you further in.

The recommended level for this area is level 20. Before heading out and exploring the area, there are a few things you should know first. Most of the enemies in this area are extremely tanky so you will be relying more on Sp attacks to defeat them.
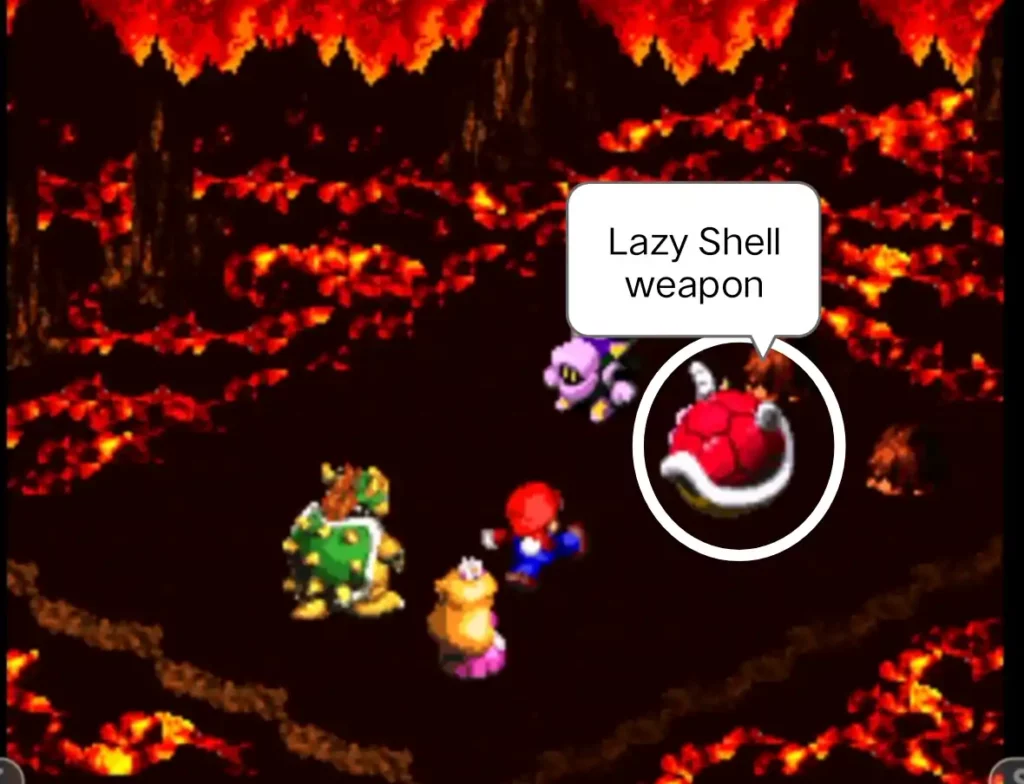
If you get the Lazy shell weapon for Mario which is obtainable at the end of the Nimbus Land stage, You can switch your strategy to basic attacks since the Lazy Shell is the most powerful weapon for Mario in the game.
To learn more about how to get the Lazy Shell, please read our guide on the Lazy Shell in Super Mario RPG.
Lastly, There are 3 Boss Battles in this area so be sure to stock up on Fp and HP items and use them sparingly in this level.
Table of Contents
- Enemies in the Area
- Area 1 (room after volcano entrance)
- Area 2
- Area 3
- Area 4 (star Power-Up chest)
- Area 5 (Corkpedite guard area)
- Area 6
- Area 7 (frog coin in lava)
- Area 8
- Area 9 (frog coins on collapsing platforms)
- Area 10 (Stumpet/Oerlikon guard area)
- Area 11 (save room)
- Area 12 ( Stumpet/Magmus guard area)
- Area 13
- Area 14 (Corkpedite guard area)
- Area 15 (Stumpet guard area)
- Area 16 (Hinopio)
- Area 17 (Hino Mart)
- Area 18 (save area)
- Area 19 (platform bridge)
- Area 20 (Czar Dragon Lair)
- Boss fight Czar Dragon
- Boss fight Zombone
- Area 21 (Star Piece and Axem Rangers)
- Area 22
- Area 23
- Barrel Volcano exit
- Boss fight Axem Rangers
- The 6th Star Piece
Enemies in the area
| Name | Hitpoints | Attack | Gold coins | Experience | Weak | Item drop |
| Armored ant | 230 | 130 | 5 | 30 | Ice | Power blast |
| Chained Kong | 355 | 150 | 8 | 35 | Ice | Max mushroom |
| Corkpedite Body | 200 300 | 130 100 | 10 | 50 30 | Ice Ice | Fright bomb |
| Magmus | 50 | 110 | 3 | 18 | Ice | Bracer |
| Oerlikon | 85 | 120 | 0 | 22 | Ice | Energizer |
| Pyrosphere | 167 | 105 | 2 | 17 | Ice | None |
| Stumpet | 500 | 200 | 15 | 70 | Ice | Fright bomb |
| Vomer | 0 | 110 | 0 | 19 | None | Pure water |
Armored Ant
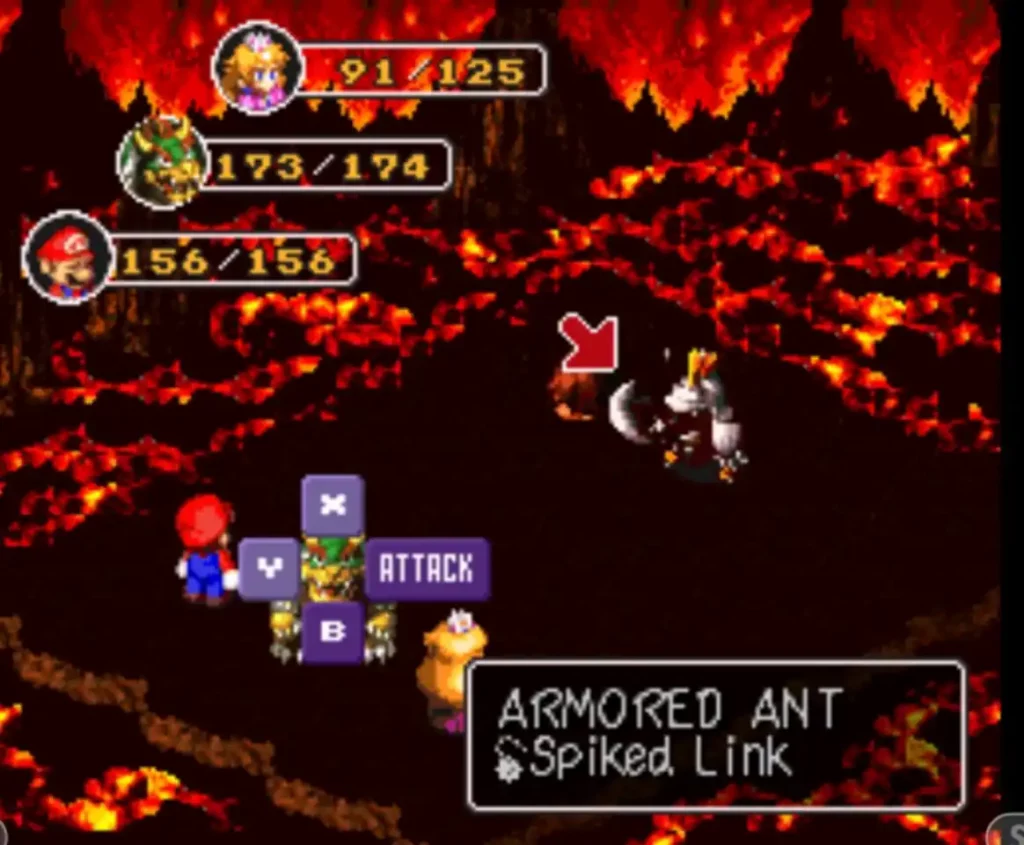
Armored Ants have great physical defense and uses physical attacks. They can also cast Vigour Up which is a skill that boosts their physical defense when close to dying. Have the party use timed hits to save your Fp when facing them in small groups.
Oerlikon
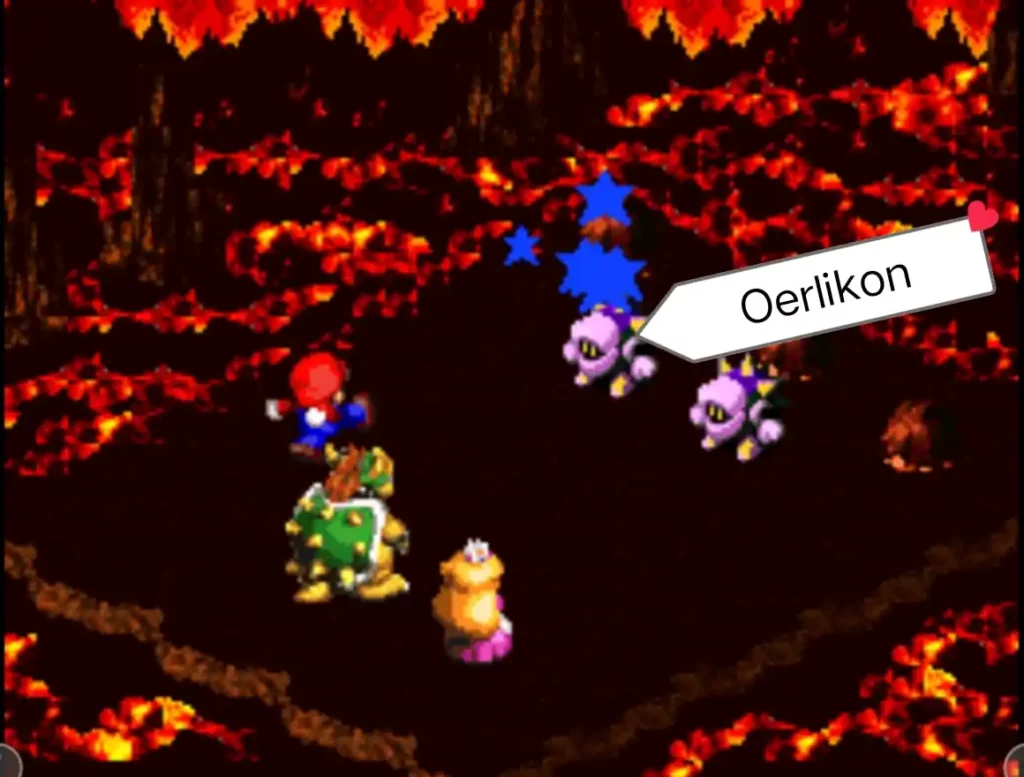
Oerlikon are powerful versions of Shelder that rely on Poison Attacks to wipe out your party. Their attacks don’t deal high damage but getting hit by their poison sting will let you lose around 10 Hitpoints per turn.
Have your party equip accessories that negate poison effects like the safety badge or have Toadstool cast group hug whenever any of your party gets hit by poison.

Use timed hits to defeat these monsters and only use Sp attacks only when faced with a large group of them to save your Fp for tougher battles.
Chained Kong

This monster has moderate defense and high physical attacks. With over 300 Hitpoints, Chained Kong can at least attack 2 or 3 times before being defeated. Using timed defense should be a priority when facing them in battle to lessen the damage you receive or dodging the attacks completely.
Vomer
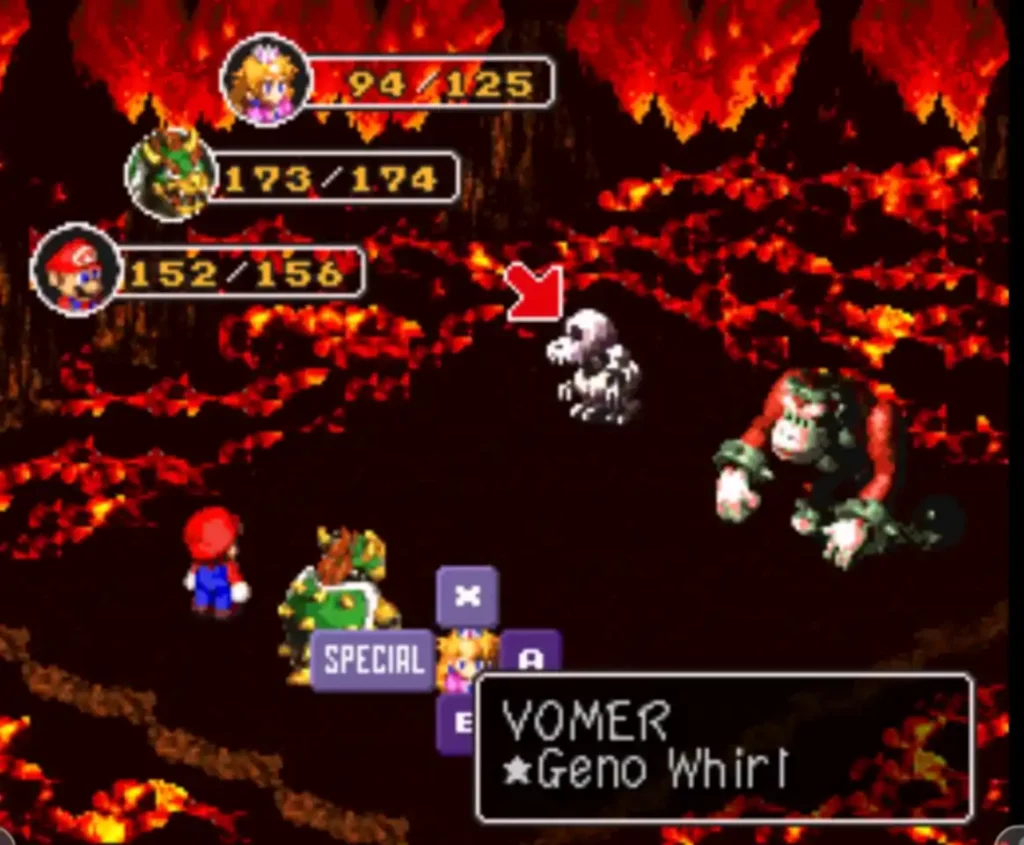
Vomer are powerful versions of Dry Bones, The skeleton turtle you encounter at the Sunken Ship. They cannot be killed with basic attacks and you will have to use any Sp skill that does damage to kill them off. They also respawn after a few moments which makes them a good enemy for farming small experience points. They deal low damage to the party so target these enemies last when faced with a party with mixed enemies.
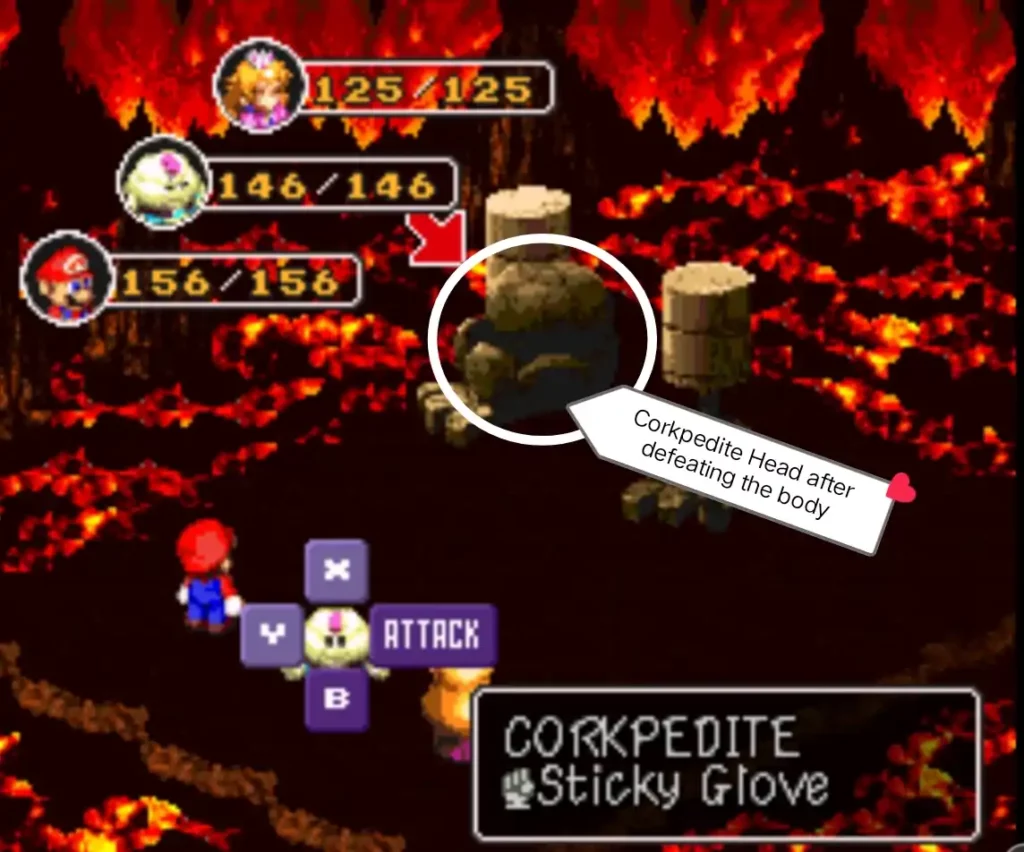
Corkpedite and Body
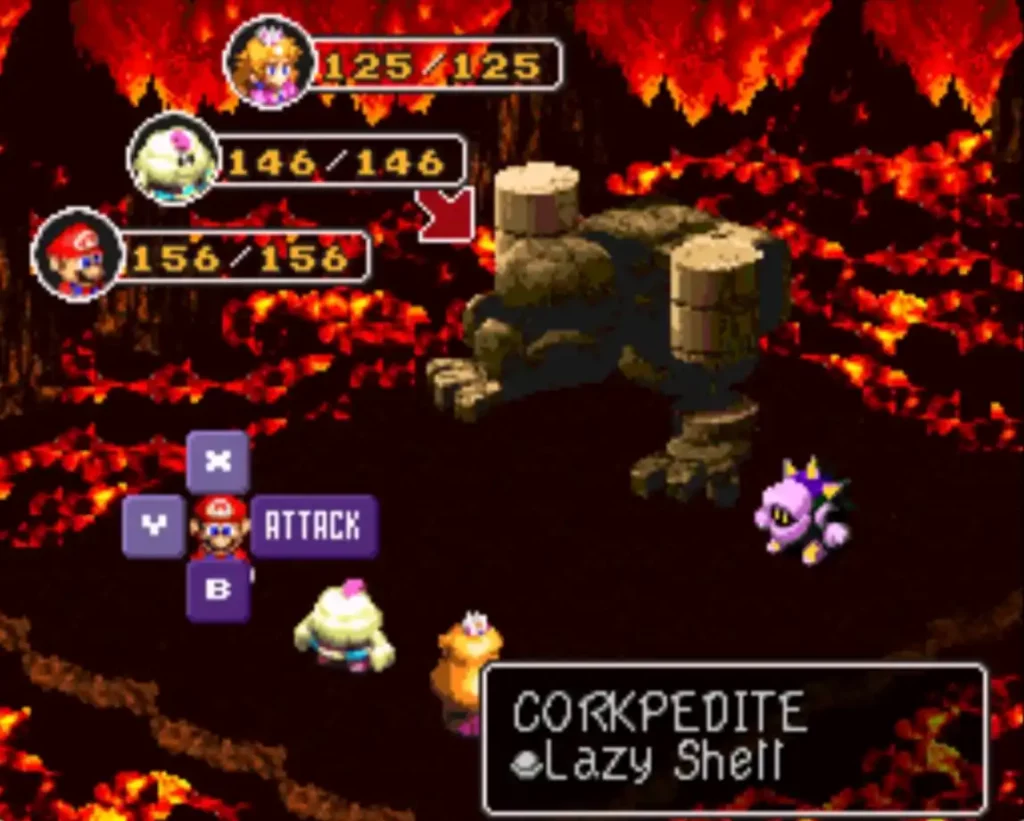
The Corkpedite monster has a body and a head that you need to destroy to defeat it. Both parts have their own turn order and they also attack on their respective turns. While both of them are troublesome to fight, what makes this monster deadly is the. Body’s skill “migraine” which is a mortal blow skill that instantly kills 1 party member when used. This can be countered by having an accessory equipped that blocks mortal blows like the ghost medal, safety ring or jinx belt.
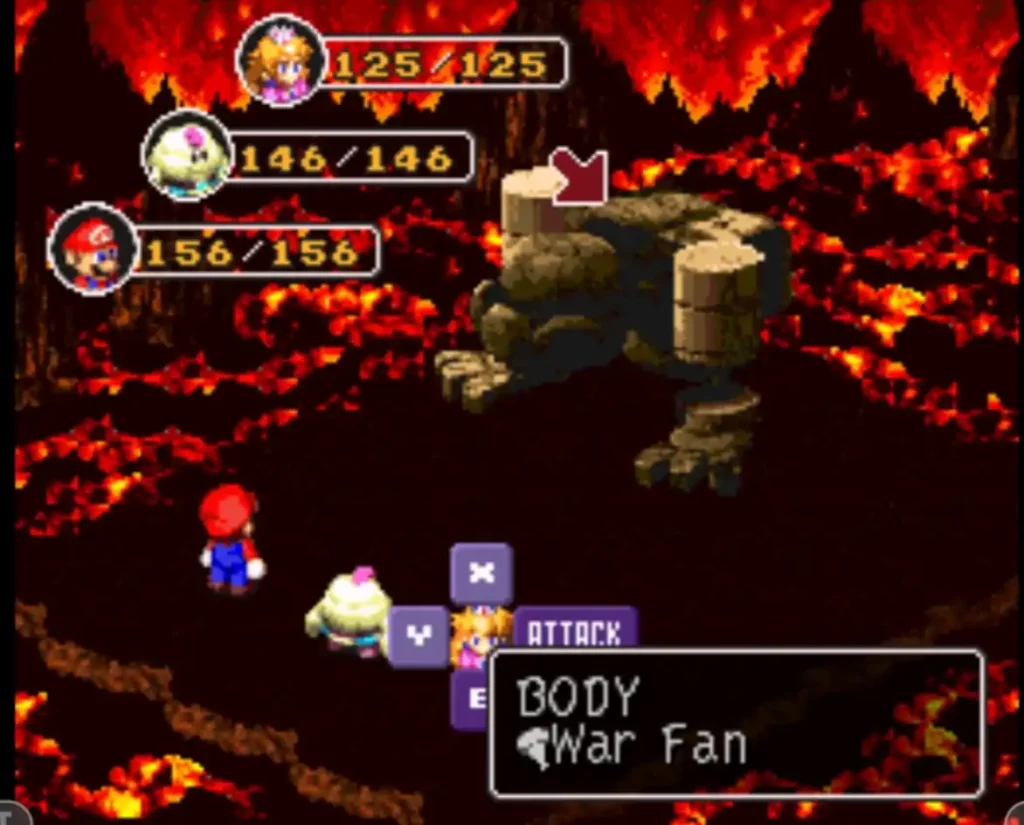
The most efficient way to deal with this monster is to aim for the body first and destroy it before damaging the head section. This makes the Corkpedite unable to use migraine and makes the fight easier since it only takes 1 timed hit to defeat the head right after defeating the body.
To learn more about Mortal Blows and how to counter them, Please read our guide; What are Mortal Blows in Super Mario RPG.
Pyrosphere

Pyrosphere mainly deals fire attacks to the party. Although their attacks are a bit harder to dodge, their overall damage are low especially if you upgraded your armor at the shop in Nimbus Land. Timed hits work really well against them but when faced with 2 or more of these monsters in a group, You can have Mallow cast thunderbolt first and have the rest of the party finish them off with basic attacks to make the fight end faster.
Magmus
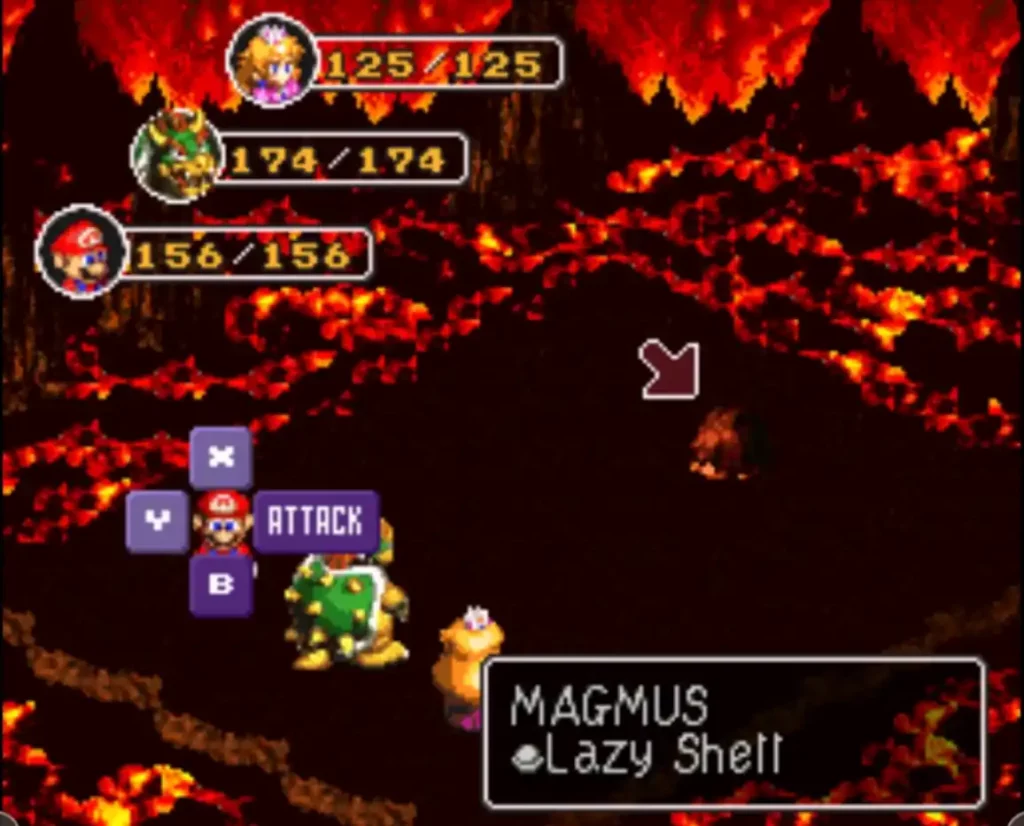
You will be facing a lot of Magmus mobs in Barrel Volcano. Almost every battle here will include 1 or more Magmus monsters in the party. They are extremely tanky even with their overall Hitpoints at only 50.
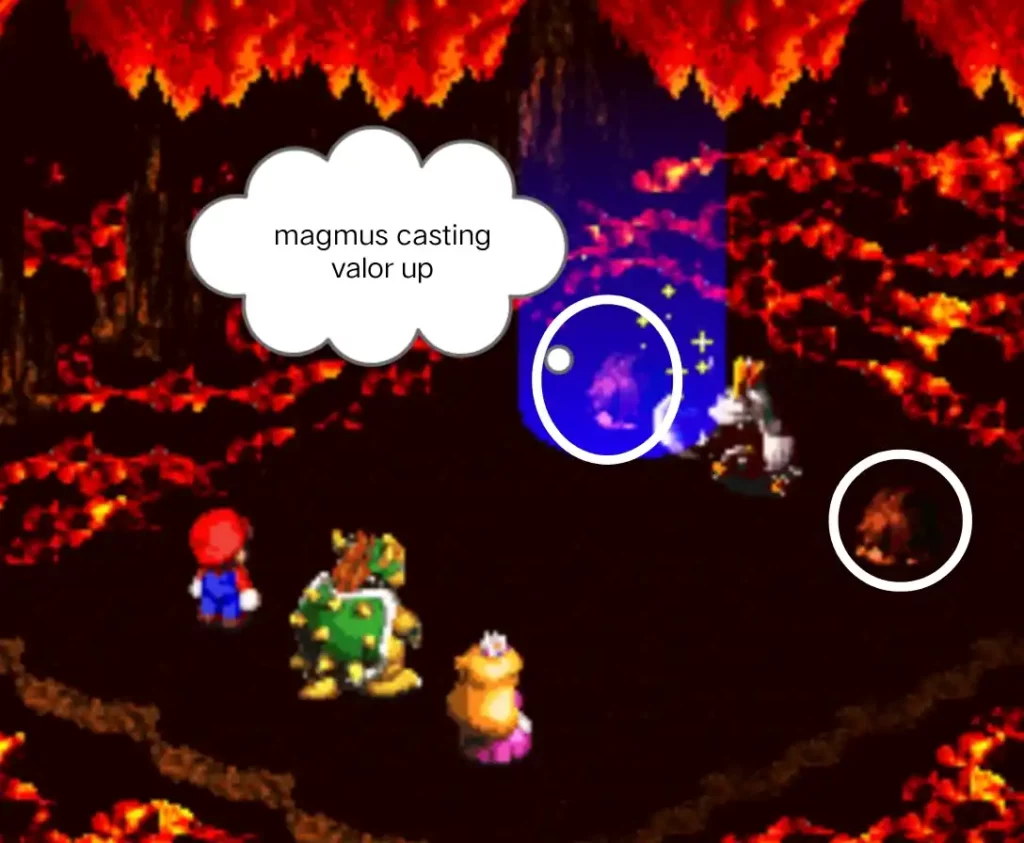
When they receive around 30 damage, they will sometimes cast valor up which increases their already high defense making them almost impossible to defeat with physical attacks. Using Mario’s Lazy Shell weapon against them bypasses their defense so it’s best to have Mario deal with Magmus when facing them in battle. If you don’t have the Lazy Shell with you, use Sp attacks especially Mallows Ice to one shot these monsters in a fight.
Stumpet

This Volcano like monster has the highest Hitpoints among all the mobs in the area. Aside from being tanky, they deal high damage as well. However, they use up 1 turn to ready it’s attack which shows when a text appears that it’s furious.
After 1 turn, they attack by spewing hot lava that deals a good amount of damage to your party. When facing a Stumpet in battle, end the fight quickly by using timed hits with Mario and having the rest of the party use their high damage Sp attacks. Having Geno in a fight will be extremely useful in this situation since his skill, Geno Whirl can one shot the Stumpet when timed right.
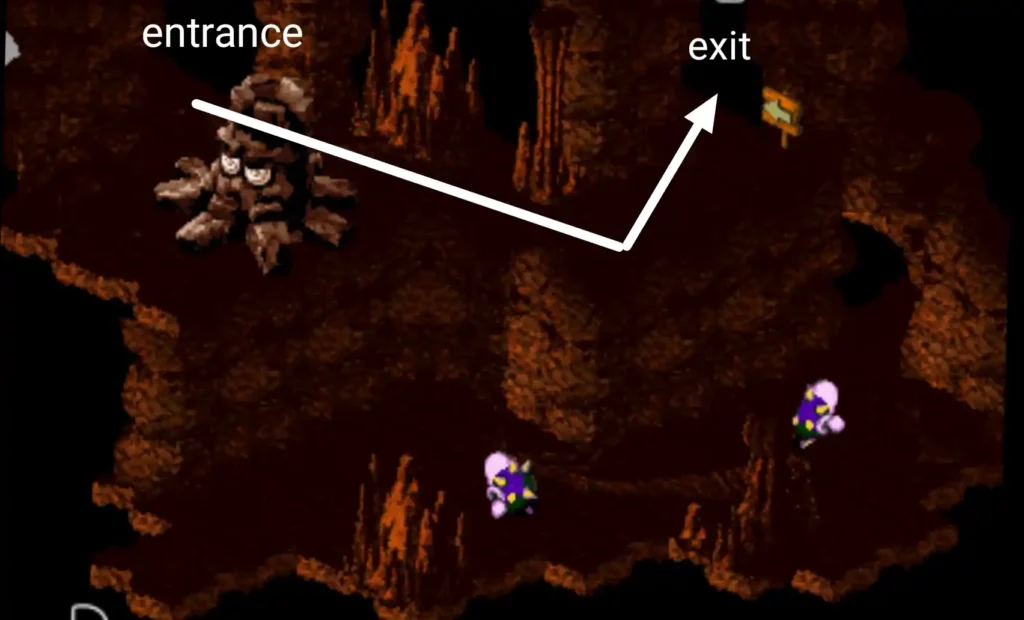
Area 1 (room after volcano entrance)
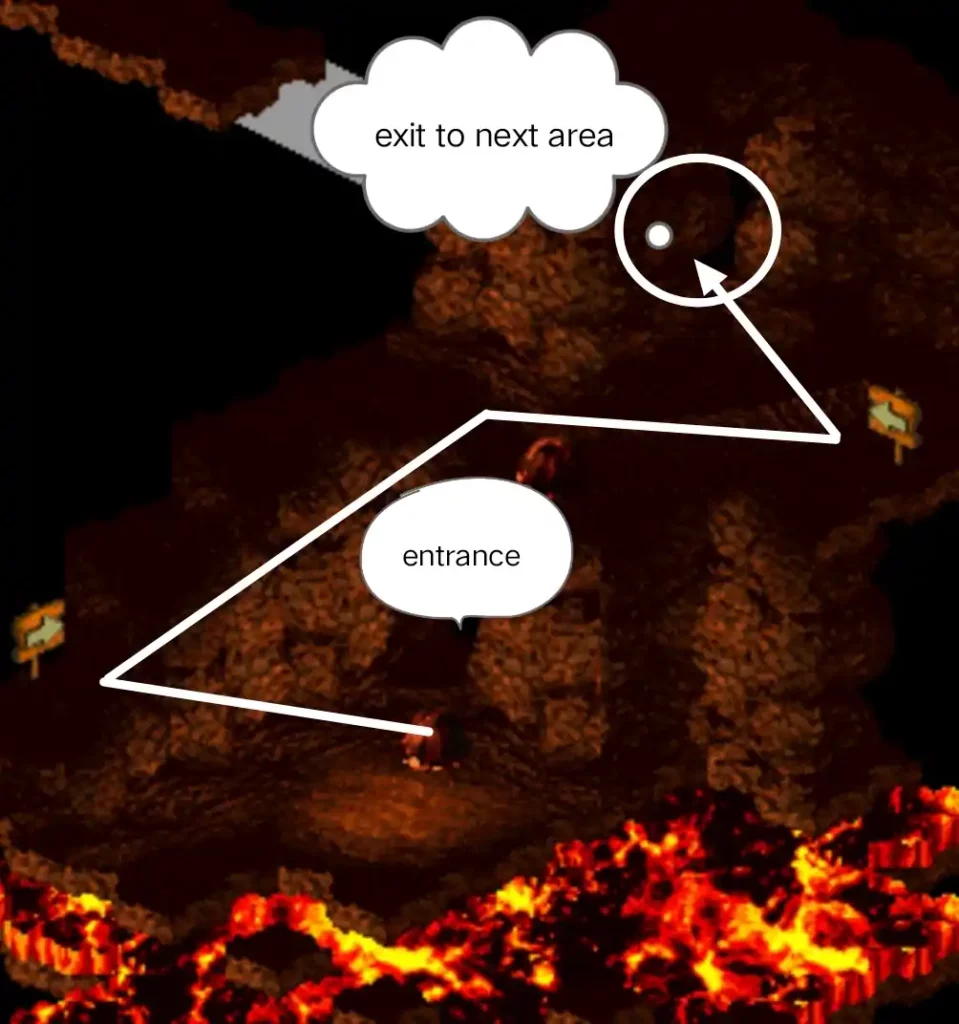
The area is patrolled by groups of Magmus. Quickly defeat them then climb up the platforms to reach the exit located at the top of the area.
Area 2
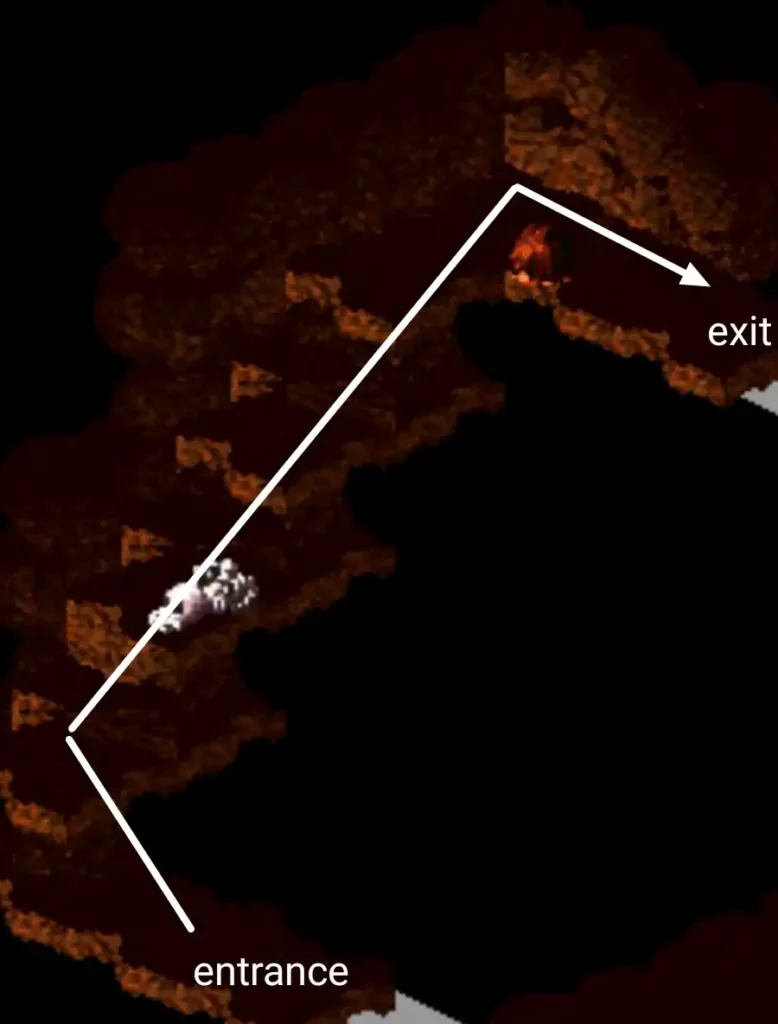
In the next area, climb up the steps past Vomer. Don’t forget to use Sp attacks on Vomer since he cannot be defeated with basic attacks or timed hits. The exit is located at the top right corner of the room.
Area 3
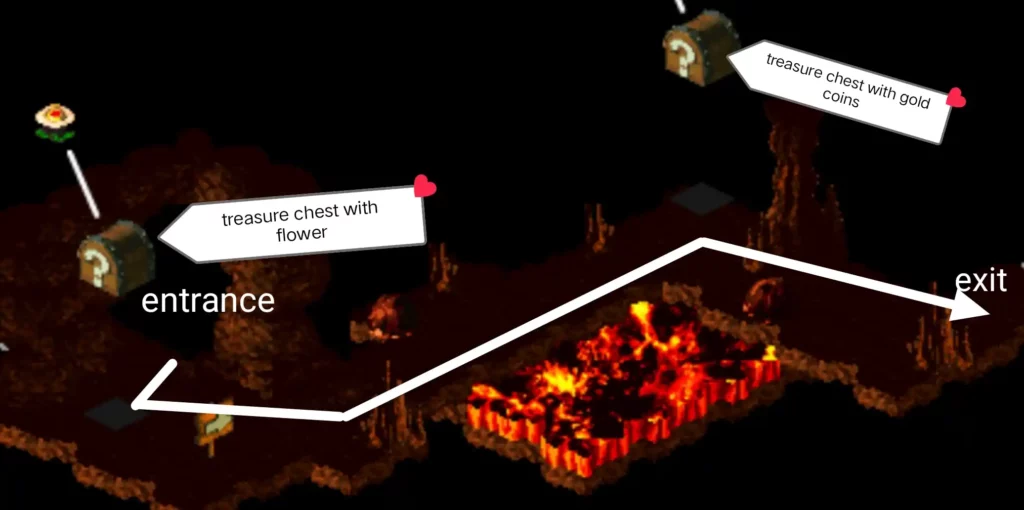
Grab the flower inside the treasure chest as soon as you enter the area. As you head further in, Another treasure chest containing 100 gold coins is located at the top right edge of the room.
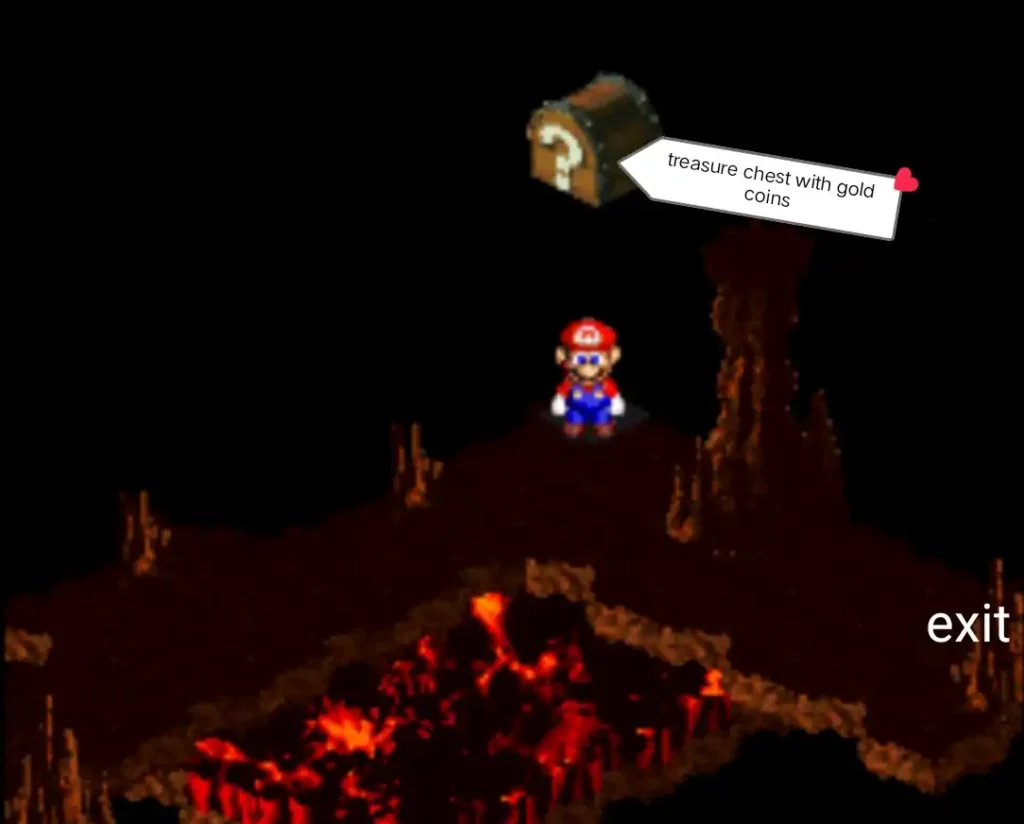
Be sure to clear all the enemies in this area before you jump and grab the gold coins. The mobs here are pretty aggressive and will attack you as soon as you jump and grab the first gold coin. After getting the coins inside the chest, head towards the exit located at the right side of the room.
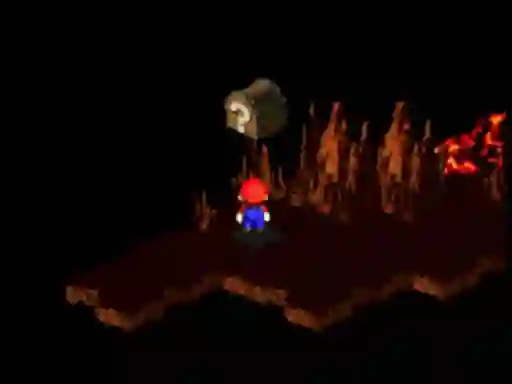
Area 4 (star Power-Up chest)
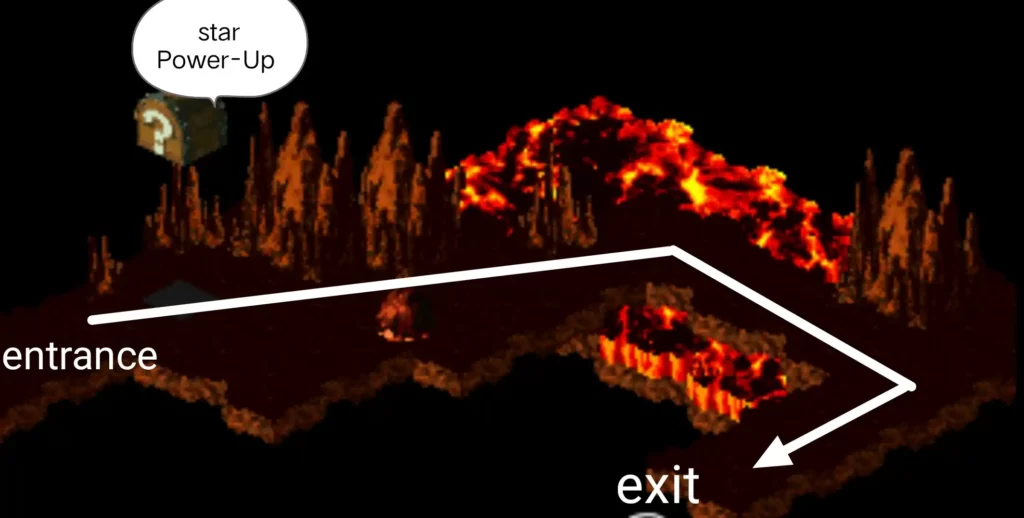
The next area has a treasure chest containing a star Power-Up inside. If you move fast enough, you will still have the star Power-Up effect in the next area where you can use to bowl over the Corkpedite to earn you experience points without engaging the enemy.
Area 5 (Corkpedite guard area)
As soon as you grab the Star powerup in Area 4, Dash towards the exit located at the bottom left side of the room to take you to area 5.
From there, Jump up the platform and bowl over all the enemies in the area especially the Corkpedite guarding the steps upstairs for a quick experience boost.
After defeating all the enemies in the area, head towards the exit located at the top left corner of the room.
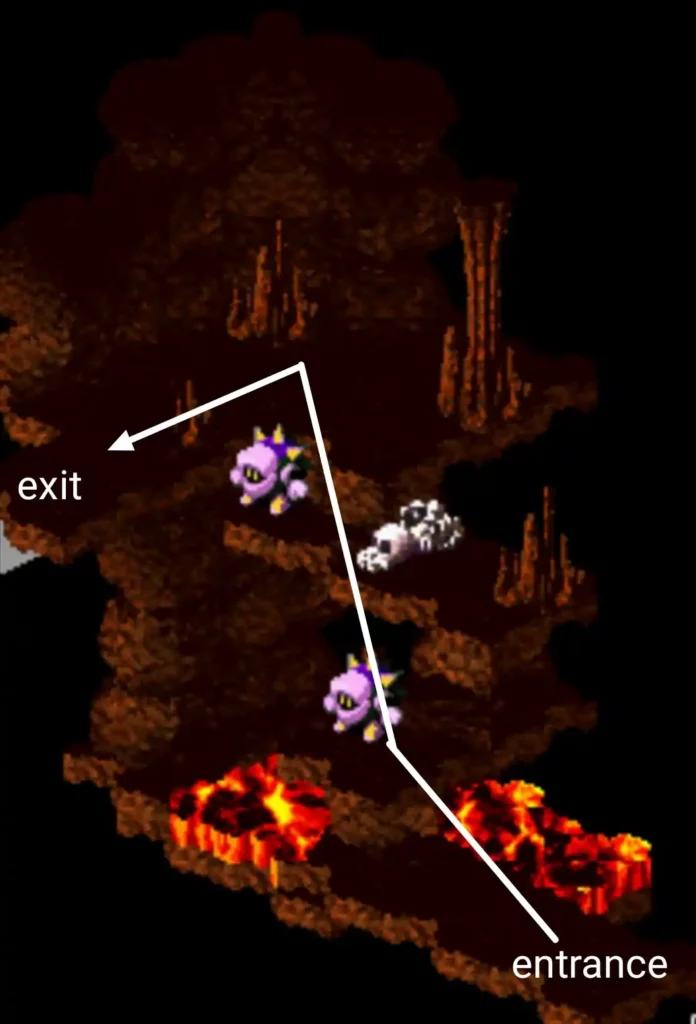
Area 6
The next are will be guarded by 2 parties of Vomer. Quickly defeat them with Sp attacks and make your way up towards the exit located at the top left corner of the room.
Area 7 (frog coin in lava)
The next area will have a frog coin suspended above the lava lake. To get it, Line your jump at the edge of the lake and jump towards the frog coin. You will be transported to the entrance of the area when landing on the lava. After getting the frog coin, head towards the exit located at the top right corner of the room.
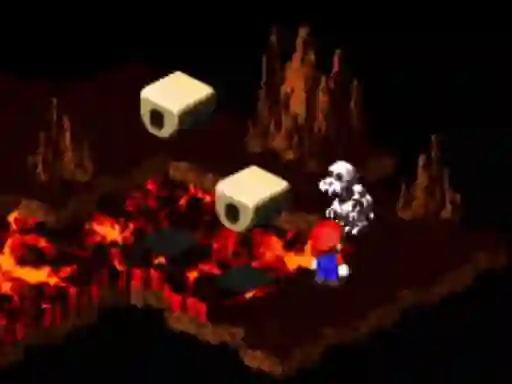
Area 8
Hop on the platforms to cross the lava lake and reach the exit to the next area. Pyrospheres will be jumping in front of each platform so time your jumps to avoid them while crossing the platforms.
Secret frog coin

There is a hidden frog coin in Area 8 that most people overlook. It’s located at the arch on top of the exit and there is a trick to getting the frog coin here.
Head towards the exit of Area 8 and when you reach the next area, Head back to Area 8 again and fall on the lava lake. This will make Mario jump up the ledge where you can easily get the frog coin located there.
Afterwards, head back to the exit and continue exploring the next area.
Area 9 ( frog coins on collapsing platforms)
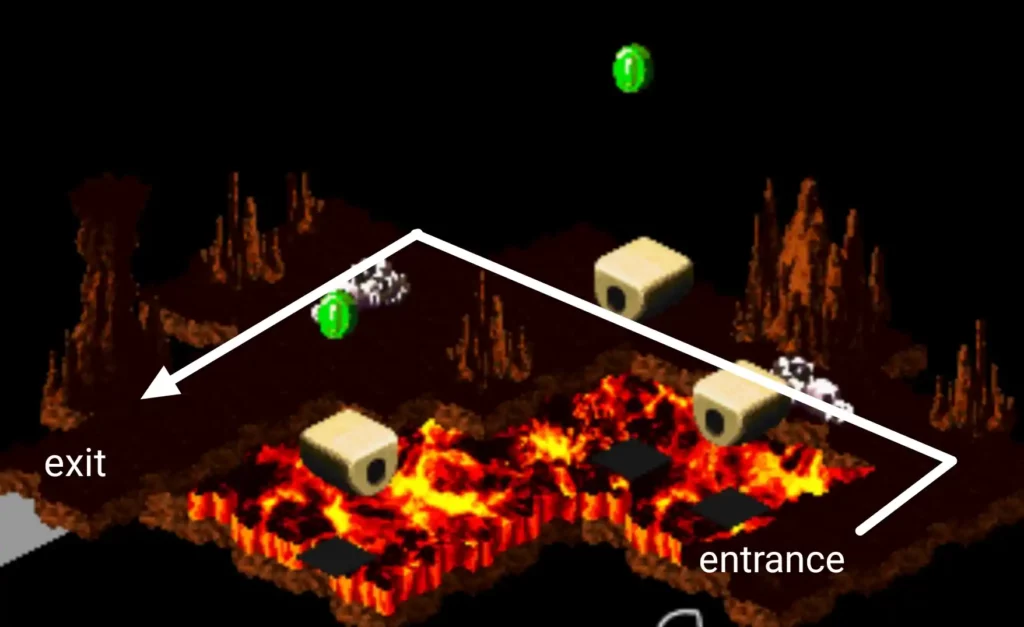
The next area has 2 frog coins suspended above collapsing platforms on top of the lava lake. You can ignore them and take the path at the edge of the lake and make your way to the exit at the left side of the room. 2 groups of Vomer will be guarding the area so be sure to use Sp attacks to defeat them.
How to get the frog coins
If you want to get the frog coins in this area then jump up the platform closest to the entrance and hop towards the second closest platform with the frog coin. Afterwards, jump towards the to edge then make your way towards the final platform at the left side of the room and jump on top of the platform to reach the frog coin. After getting both frog coins in the area, make your way to the exit at the left side of the room.
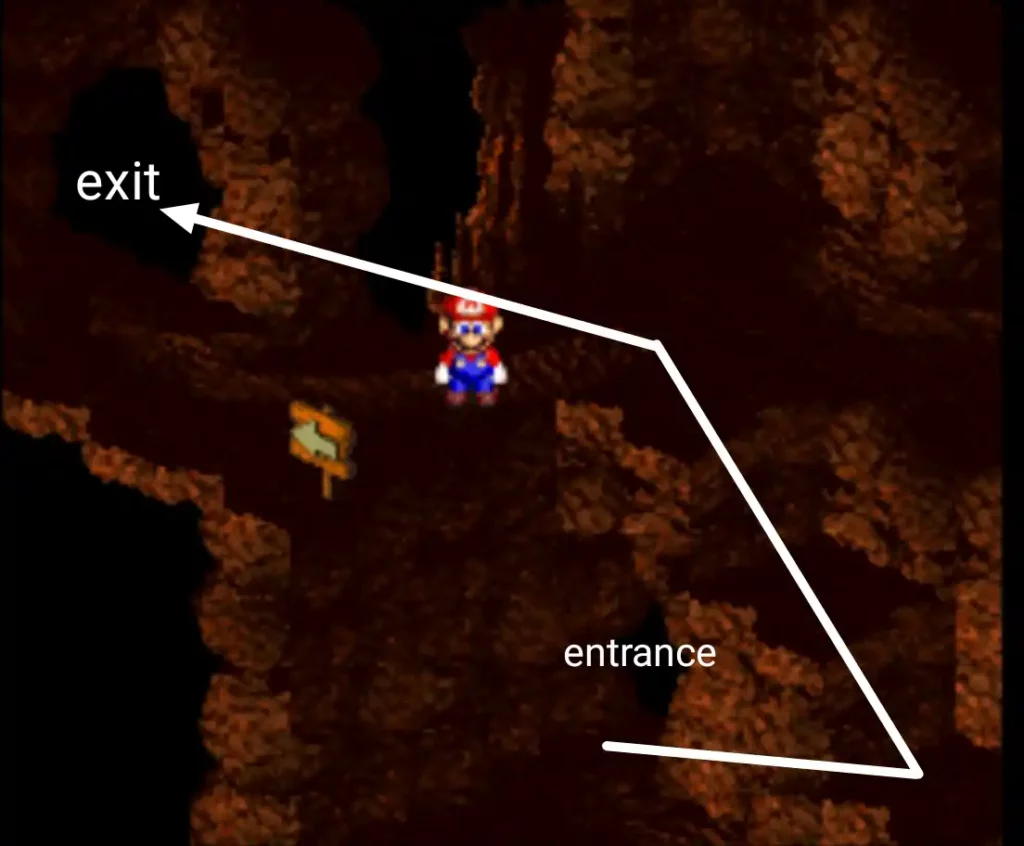
Area 10 (Stumpet/Oerlikon guard area)
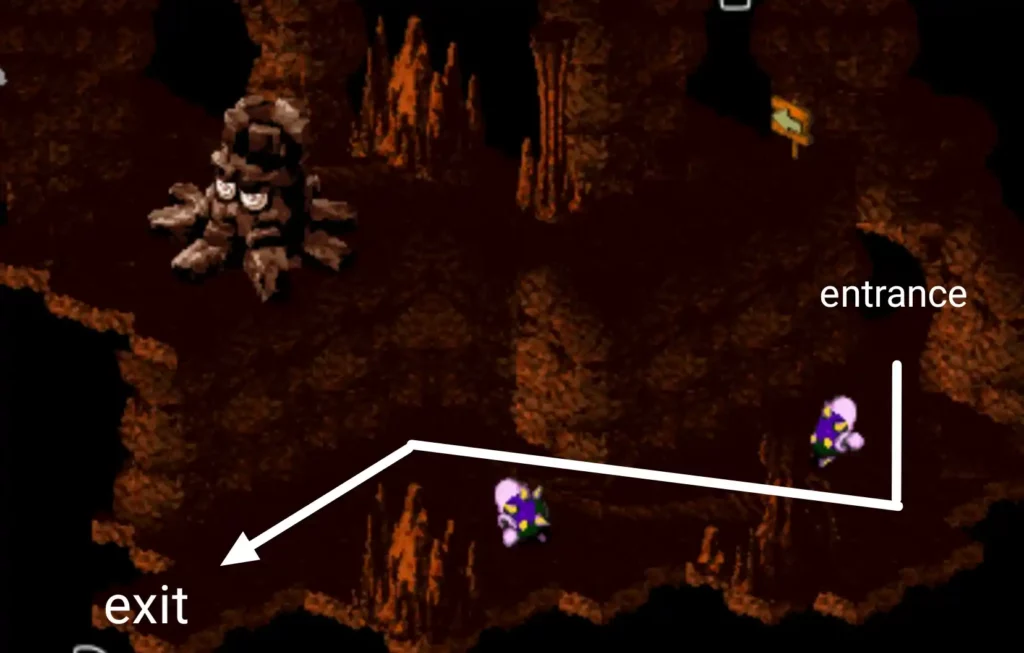
The next area will be guarded by mobs of Oerlikon. As you move deeper, you will find a Stumpet at the top platform causing earthquakes that spawns additional Magmus to block your path. Avoid fighting them and make your way quickly to the exit located at the bottom left corner of the room to take you to the save area.
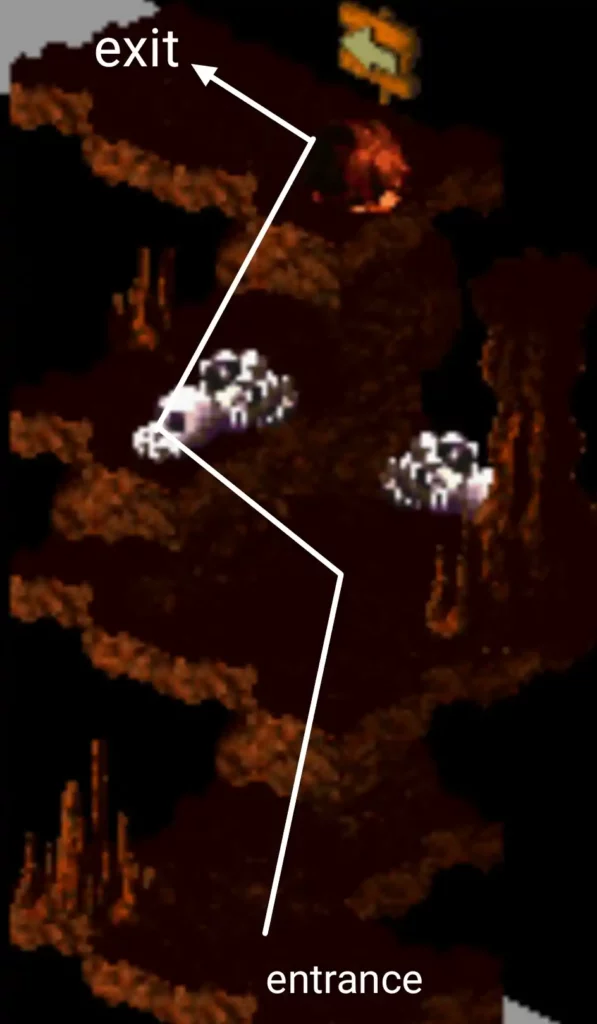
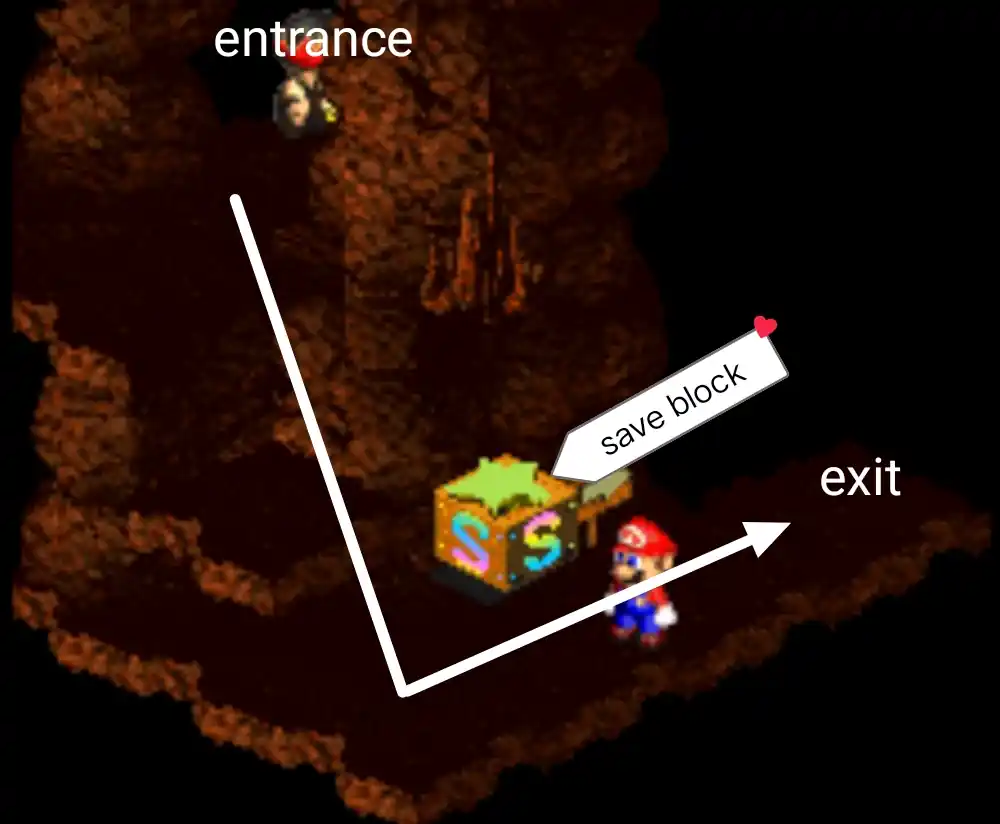
Area 11 (save room)
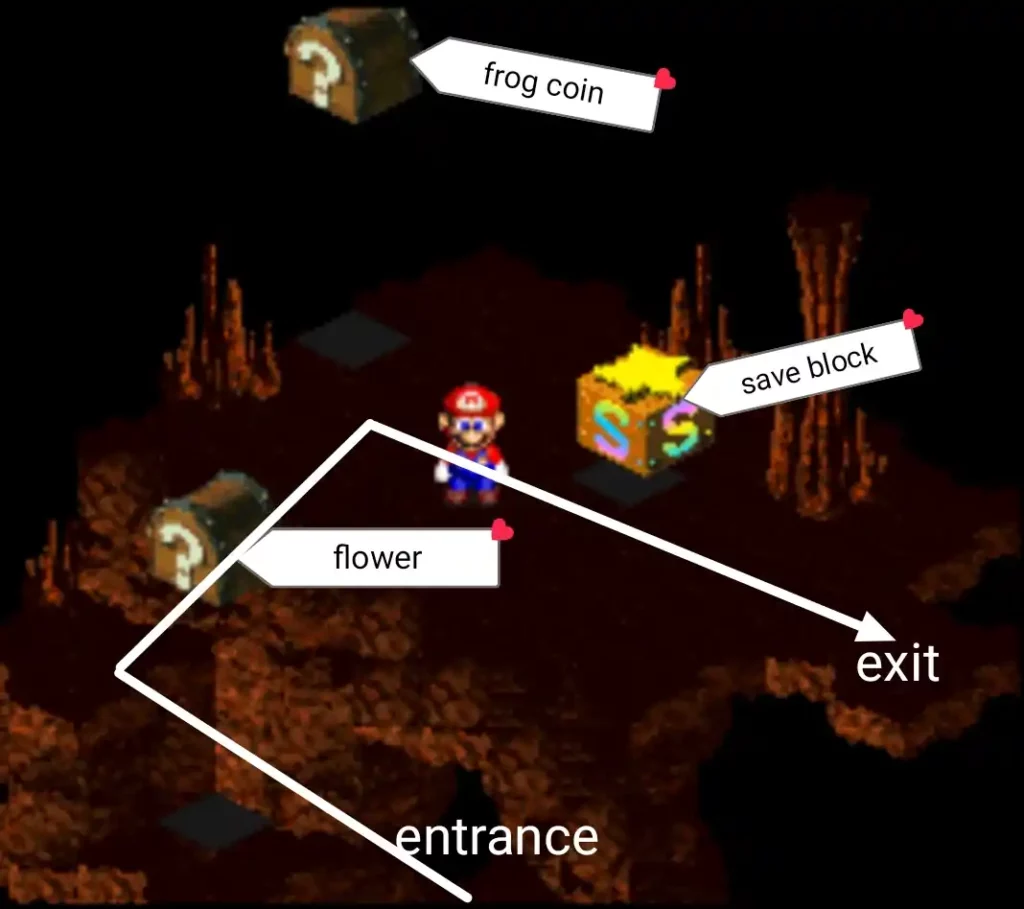
Head up by jumping up the platforms towards the save block. Before reaching the top, grab the flower inside the treasure chest and head towards the 2nd treasure chest at the top to grab the frog coin inside. Save your game after looting both chests and take the exit located at the right side of the room.
Area 12 (Stumpet/Magmus guard area)
A Stumpet will be blocking your path in this area. Defeat it quickly and make your way towards the exit at the right side of the room. Be careful not to fall off the platform while making your way across the narrow path as you head towards the exit.
Area 13
Make your way towards the top of the room. This area will be guarded by a party of Oerlikon and a group of Vomer so be ready to fight them off while heading towards the exit at the left side of the room.
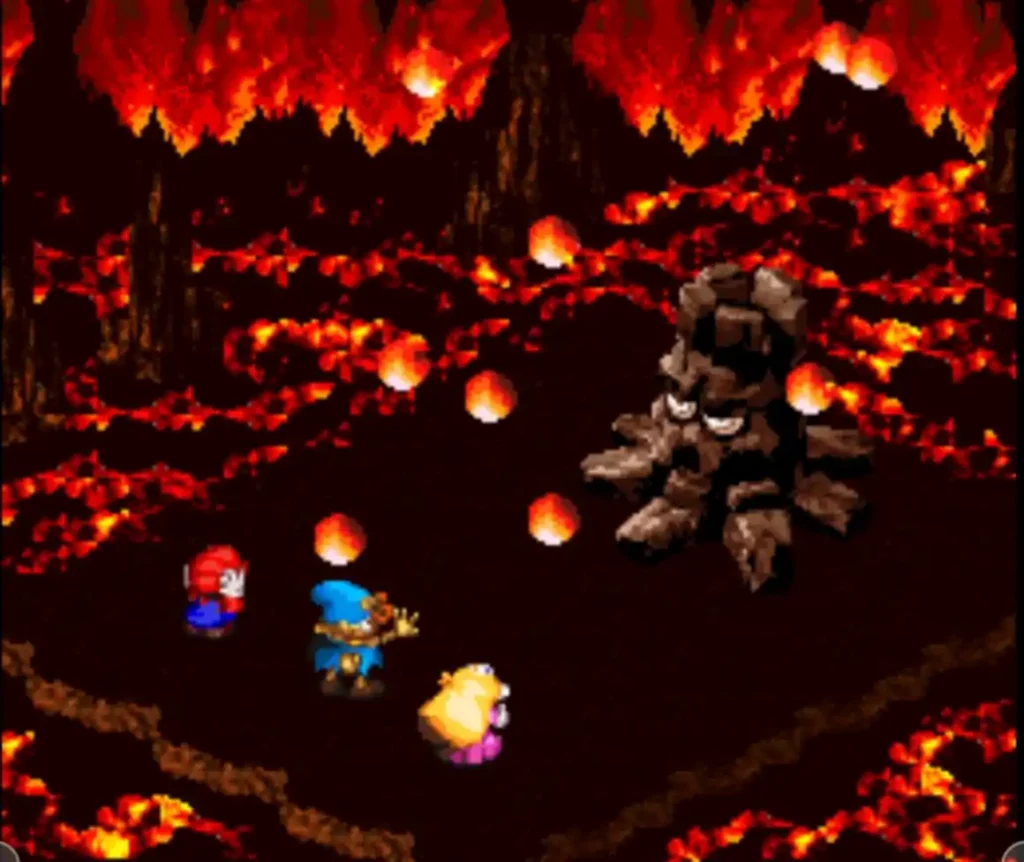
Area 14 (Corkpedite guard area)
The next area will have a Corkpedite guarding the exit and spawning mobs of Oerlikon in the area. Make your way to the top of the room and defeat the Corkpedite to access the exit at the top area of the room.
Area 15 (Strumpet guard area)
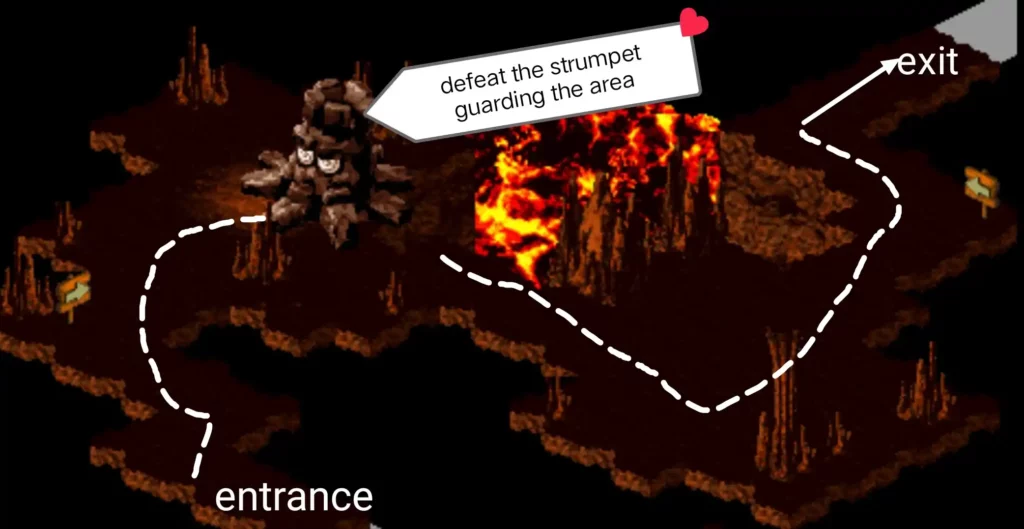
A Strumpet will be guarding the area while spawning mobs as it erupts. Quickly defeat the monster to avoid getting overwhelmed then head for the exit at the end of the path to your right.
Area 16 (Hinopio)

Make your way up the platforms to reach Hinopio guarding the entrance to a cave. After speaking with him, He will then invite you to his shop inside the cave.
Area 17 (Hino Mart)
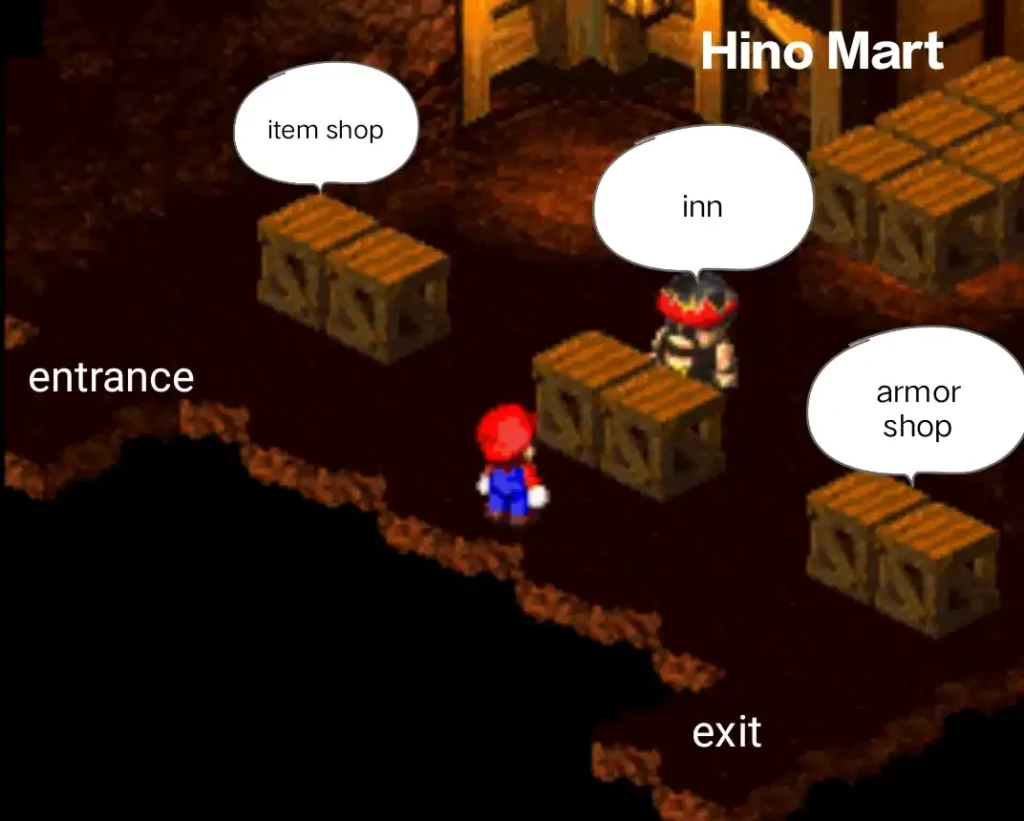
The next area is where Hinopio sets up a shop called Hino Mart. The 3 tables inside represent the 3 types of services offered by Hinopio in this area.
Hinopio’s Item Shop
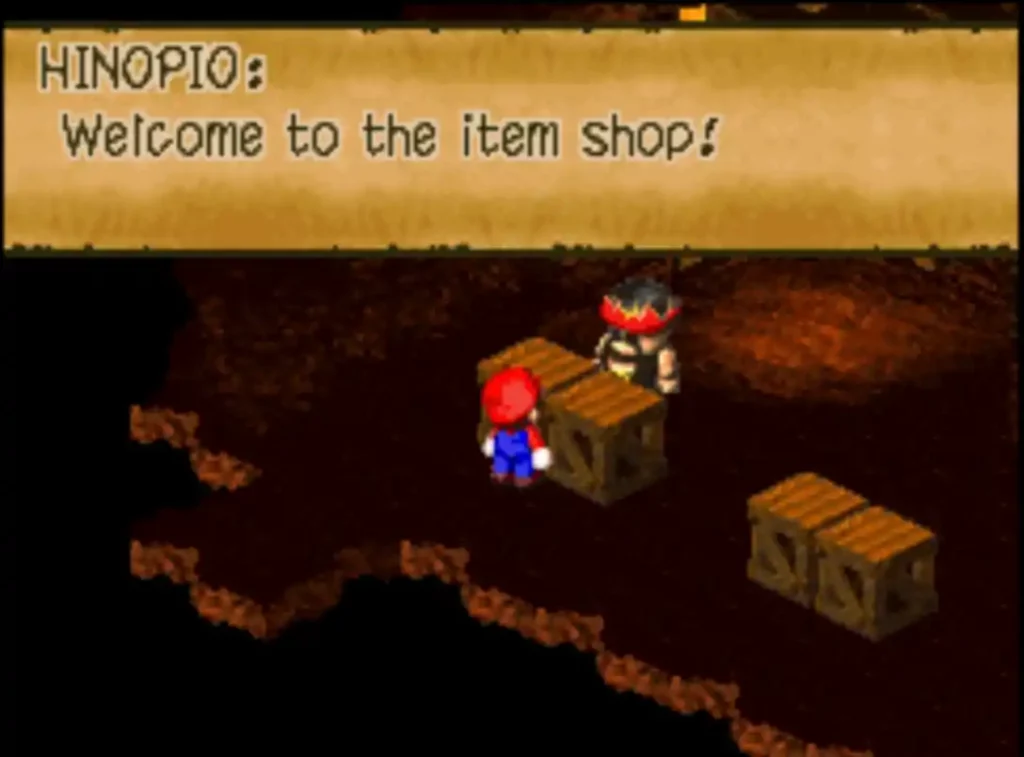
Stock up on HP and Fp items at Hinopio’s item shop. It is located at the table near the entrance to your left. Sell the bracer, Energizer and pure water items you received as loot from monsters in the area to save up space and stock heavily on Fp items since you will be using Sp attacks heavily once you reach the Boss areas.
Hinopio’s Inn
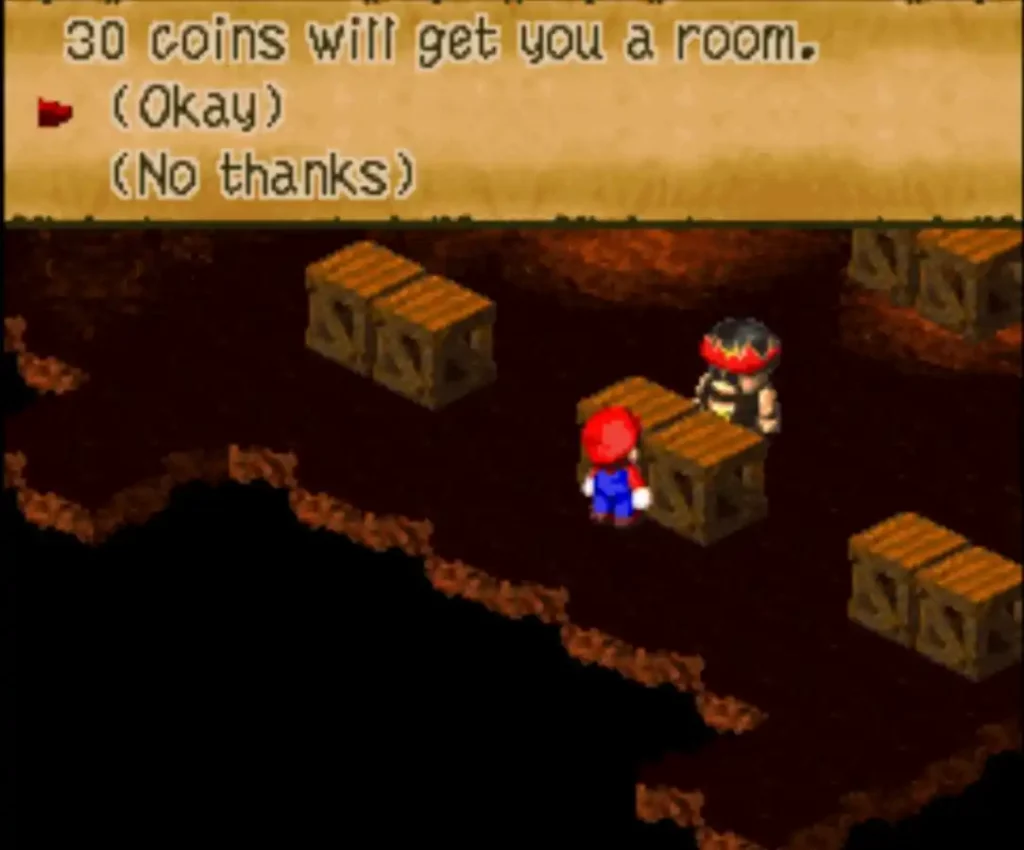
If you interact with Hinopio at the table in the middle of the room, He lets you sleep in the area for 30 gold coins. Select this if your Fp and HP need refilling then continue on to the last table to your right.
Hinopio’s armor shop
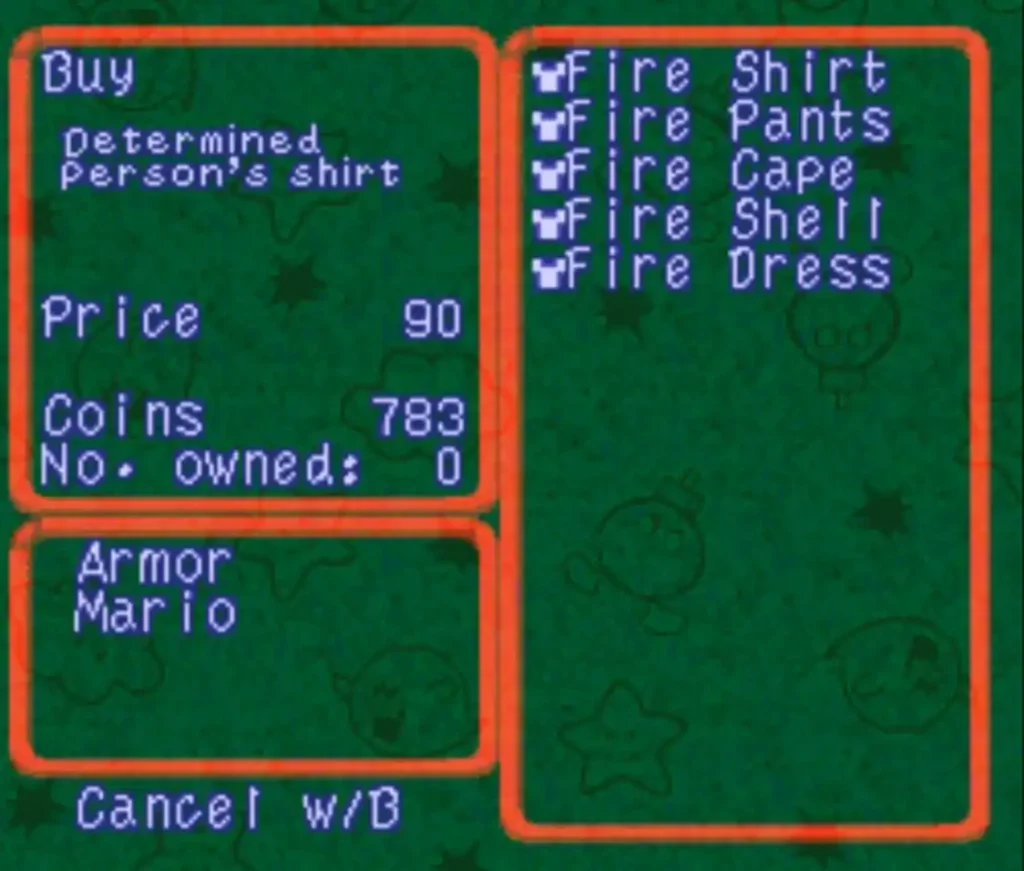
The table to your right is the armor shop. Buy the fire themed armor here to upgrade your armor. These armors will be very useful when facing the Czar Dragon later on since it grants better protection and fire elemental resistance.
After you equip the fire armor to your party, head towards the bottom right exit to take you to the save area.
If you have the Lazy Shell armor, Let Toadstool use it instead of the fire dress. This armor gives better protection at the expense of physical attack damage. Since Toadstool acts as a support character and mainly uses magic Sp attacks in battle, the physical attack debuff won’t affect her performance in battle.
Area 18 (save area)
Hinopio guides you to the save area where he stands at the entrance in case you want to visit his shop again. Head down and save your game at the save block before heading towards the exit. We suggest that you switch Mallow and Toadstool into your active party so you won’t have too much trouble facing the Boss fights further in.
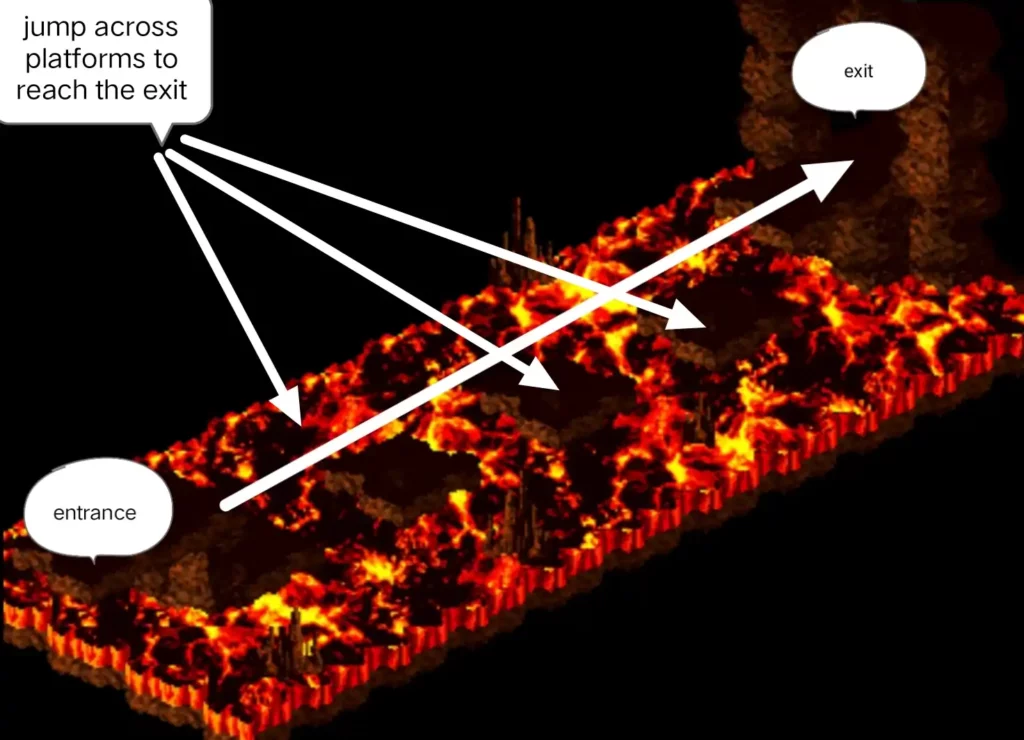
Area 19 (platform bridge)
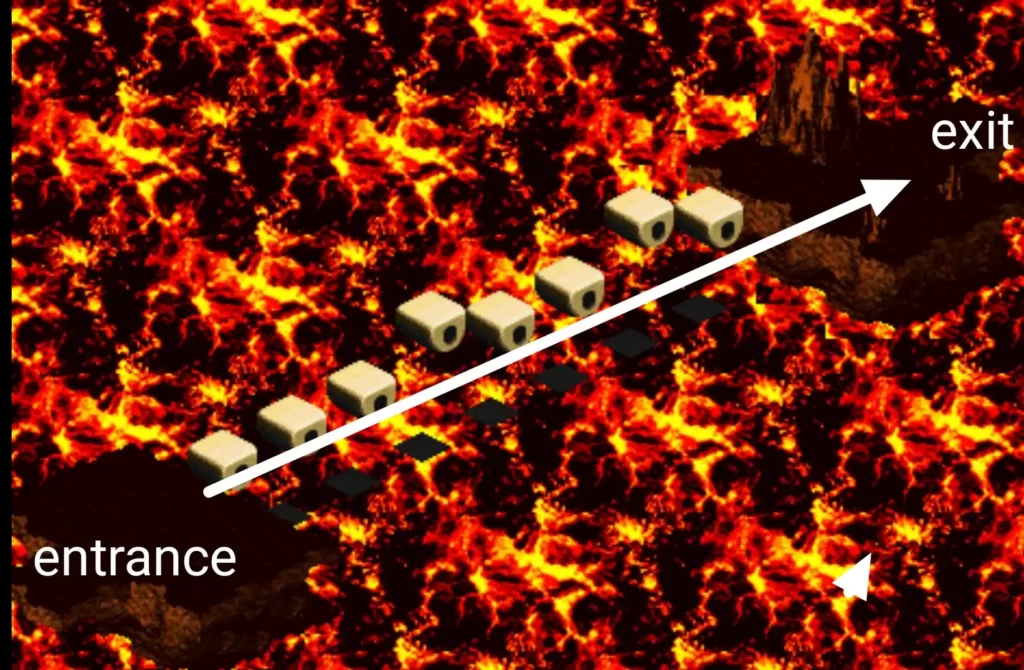
You will have to cross the lake of fire in this area via a platform bridge. Quickly jump from platform to platform until you reach the exit at the other side. Don’t stand too long on the platforms since it collapses after a few moments and you will be transported back to the entrance of the area once you fall towards the lava lake.
Area 20 (Czar Dragon Lair)
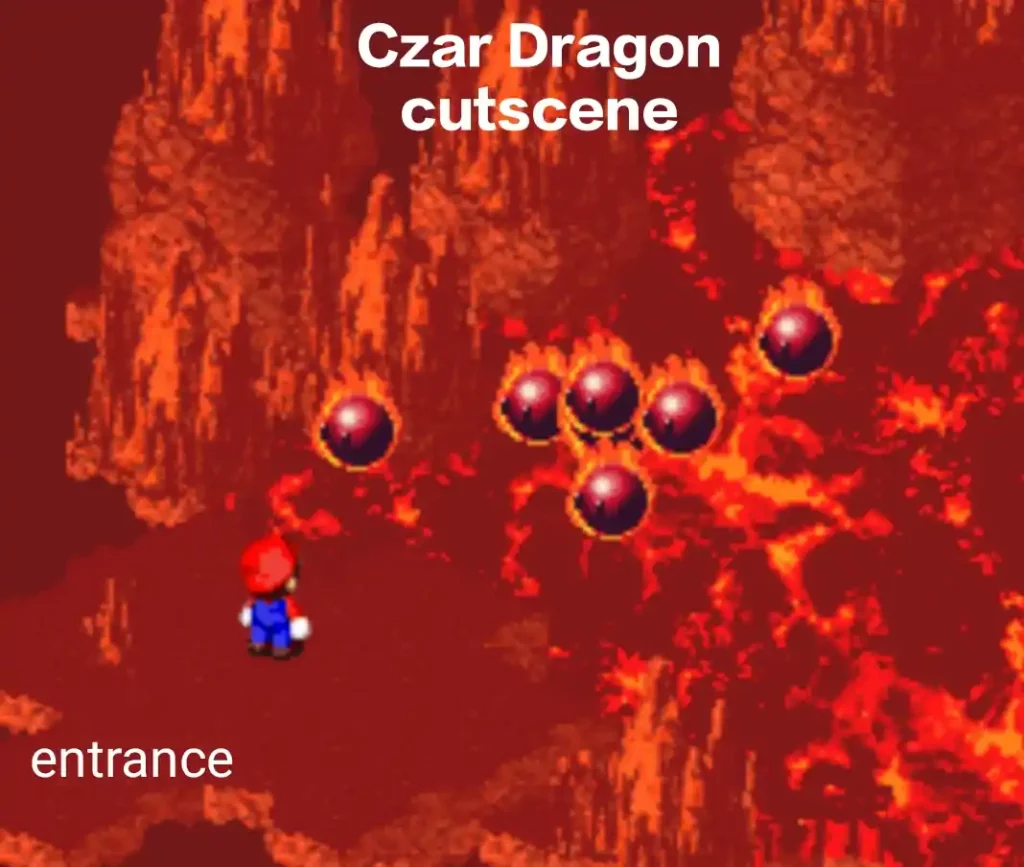
A cutscene plays where several Pyrospheres bond together and form the Czar Dragon. As soon as the dragon is formed, Mario’s party immediately launches the attack.
Although the Czar Dragon transforms into Zombone after defeating it, We have decided to treat it as a 2nd boss in this walkthrough since Zombone has a different attack pattern and different stats which makes it a completely different Boss altogether.
Boss fight Czar Dragon
| Name | Hitpoints | Attack | Gold coins | Experience | Weak | Item |
| Czar dragon | 1400 | 160 | 0 | 100 | Ice | None |
Have Mario use timed attacks at the start of the fight. As for the rest, Have Mallow use Snowy while Toadstool stands by to heal and support the party. The first turn will have the Czar dragon hit you with Basic Attacks then he switches to Sp attacks and spells on the 2nd or 3rd turn.
Water Blast
Czar dragon unleashes a spell called water blast. This gives AoE damage and can deliver high elemental damage to your party. Have Toadstool use group hug each time the skill hits to keep your life full.
Helio
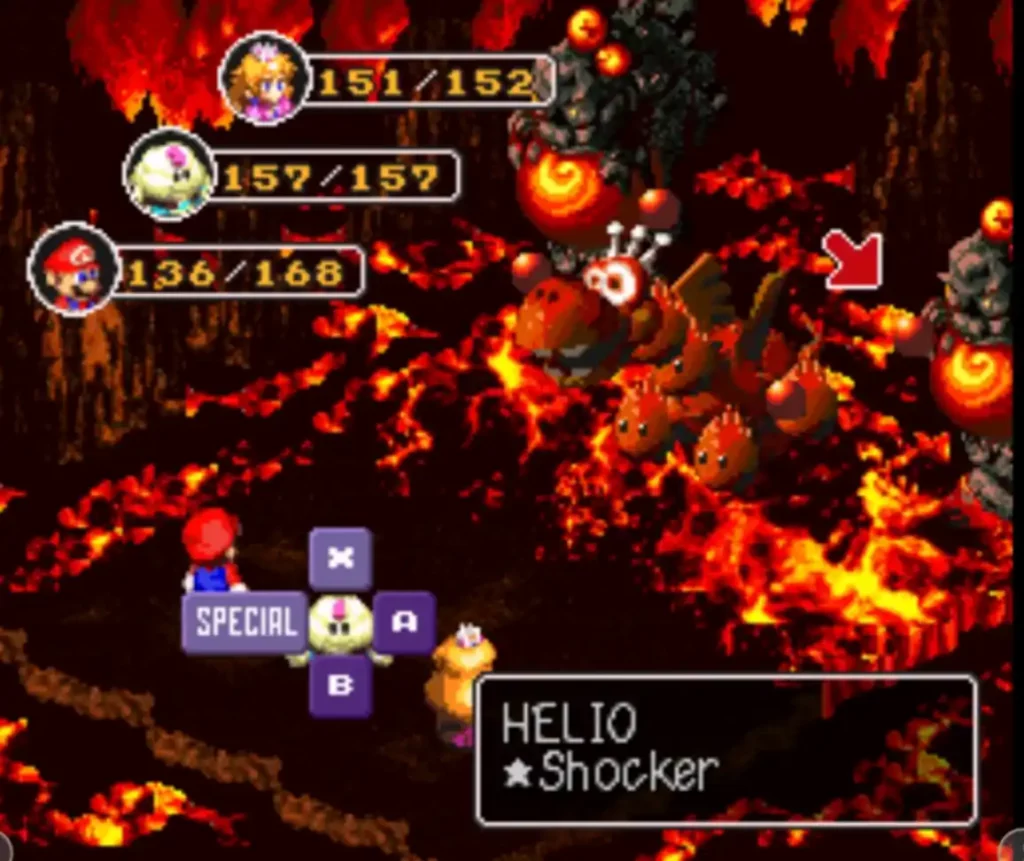
After a few turns, the Czar Dragon slams the ground and summons 4 small fire orbs called Helio. If left unchecked, these fire orbs will launch themselves at the party to deal moderate fire damage to your group.

Have Mallow use Snowy or thunderbolt when the Helios show up to defeat them before they can attack. By this time, you should use Sp attacks sparingly and have Mario deal most of the damage with timed hits.

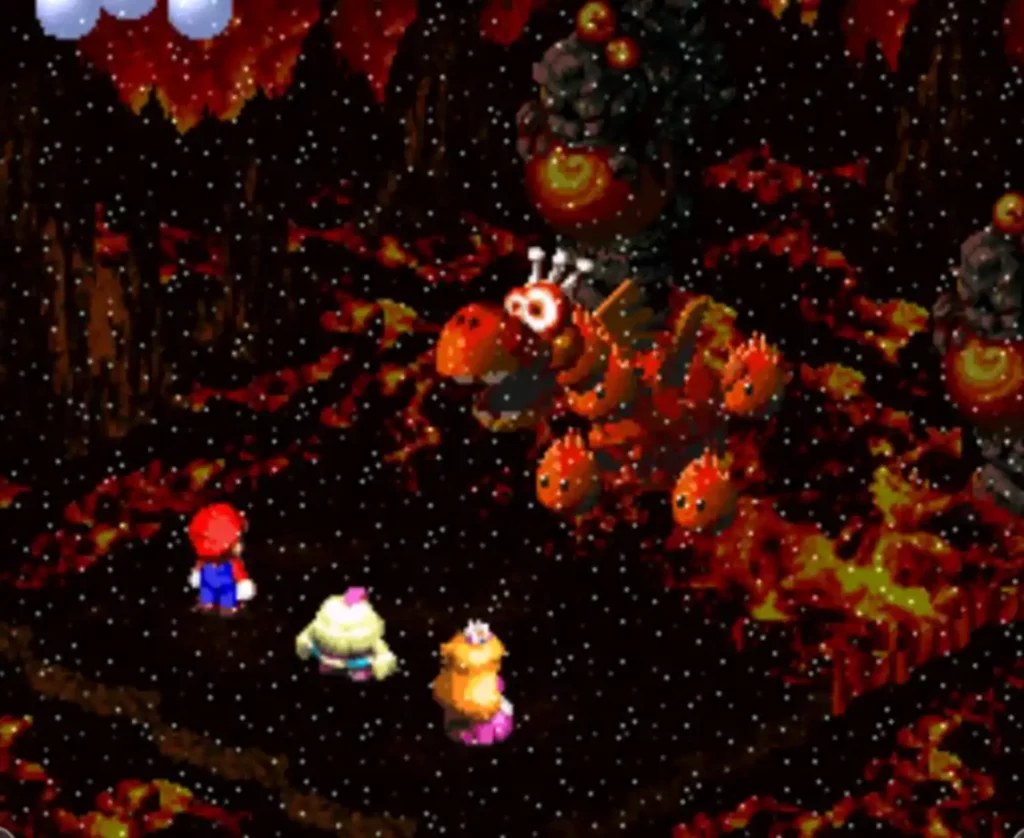
After a few more attacks, the Czar Dragon falls into the lava then eructs as Zombone with a much higher Hitpoints and attack.
Boss fight Zombone
| Name | Hitpoints | Attack | Gold coins | Experience | Weak | Item |
| Zombone | 1800 | 190 | 0 | 50 | Jump/thunder | None |
Zombone is fairly weak to jump attacks. Have Mario use super jump and chain his jumps to deal high damage. Have Mallow cast Shocker on his turn and have Toadstool replenish Fp and health when needed.
If you are having difficulty chaining your jumps to over 20 times, it’s best to have Mario switch to timed hits instead. This is also effective against Zombone especially when equipped with the Lazy Shell weapon.
Boulder
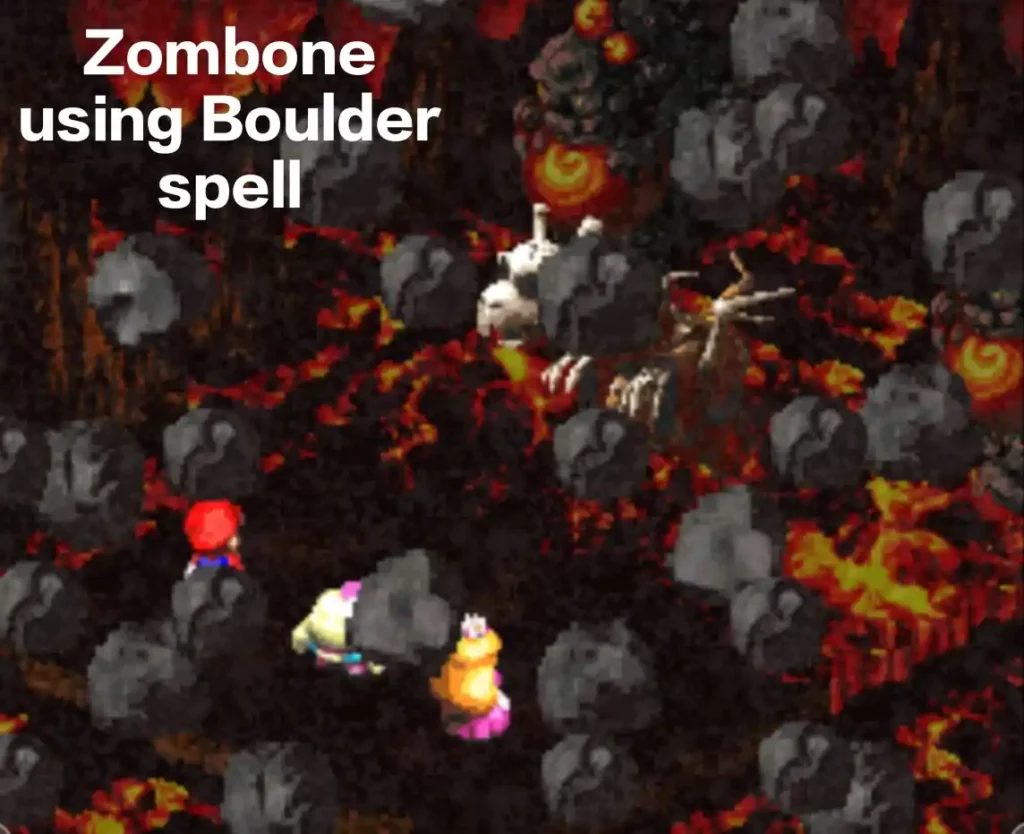
Zombone attacks twice on his turn. The first attack he does is a normal physical attacks and the 2nd will be AoE spells. One of the very first Sp attack he does is the Boulder which is an AoE elemental attack that deals earth damage to the party. Have Toadstool heal the party each time you get hit by Zombone’s Sp attacks and block his basic attacks by tapping the A button before the attack hits.
Storm
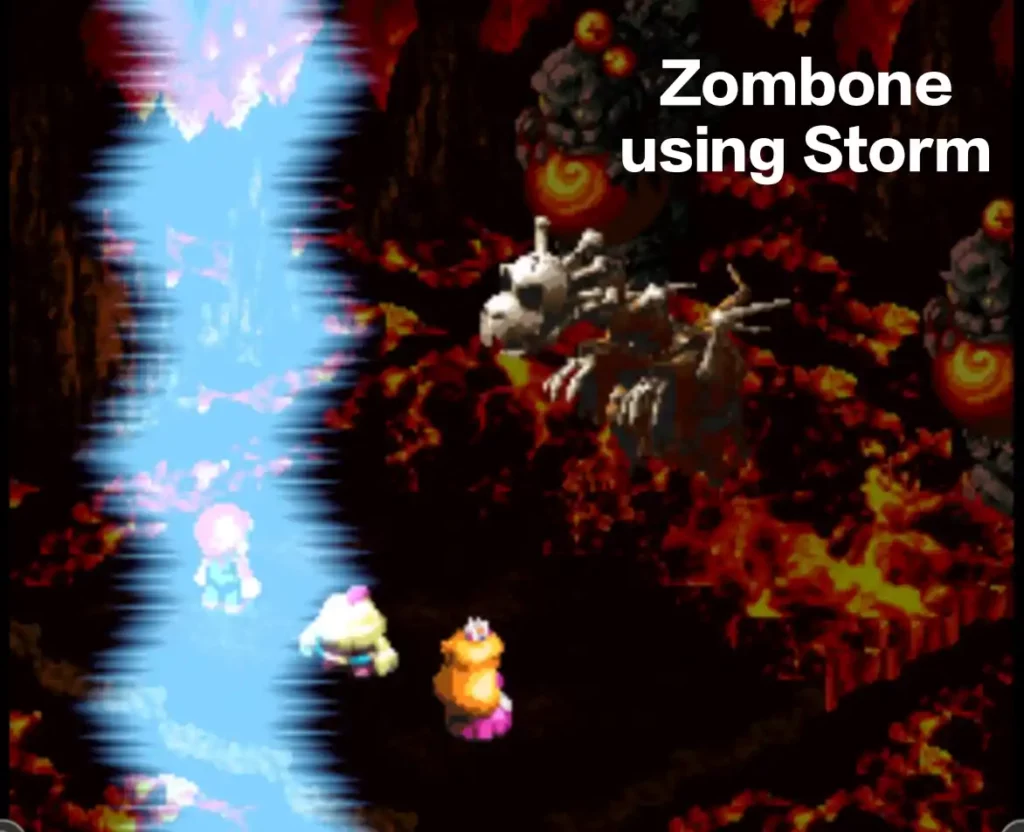
This attack does very high single damage to a party member. When Zombone uses this skill and you manage to survive it, Have Toadstool use therapy on the party member that was hit by the skill to heal the member back to full health. Have Mallow use Fp items on his turn and attack only if your Fp is half full so you won’t run out of Fp to heal once Zombone casts any of his spells.
Scream
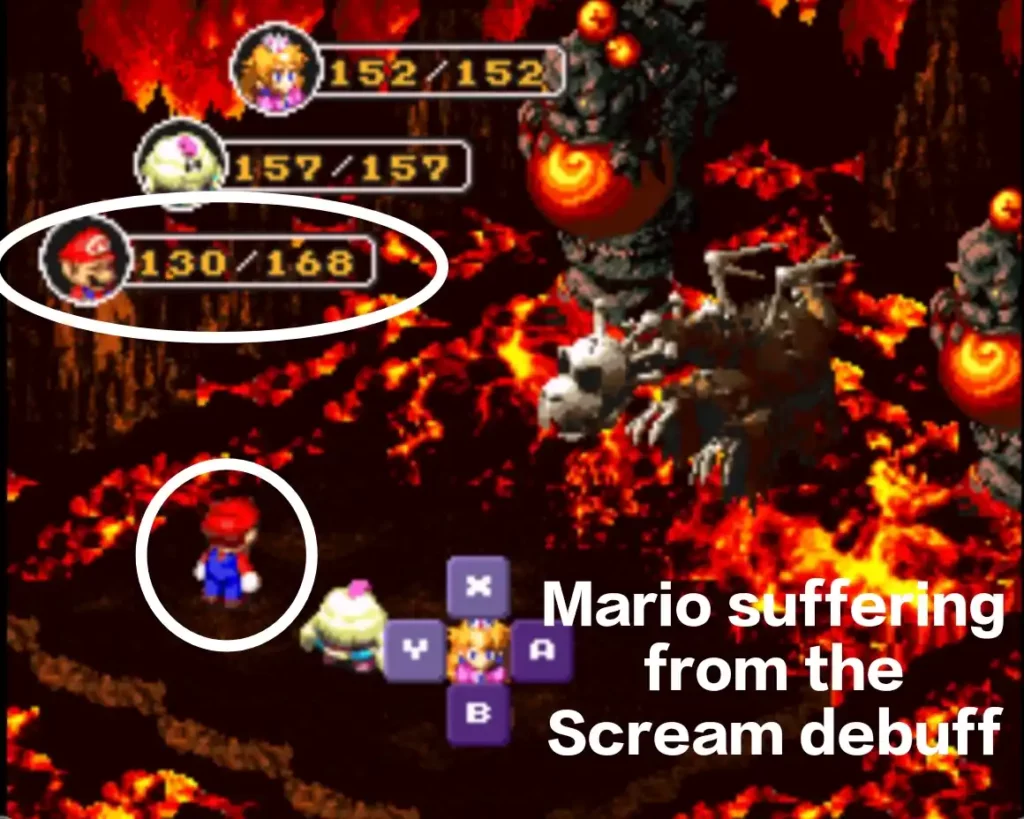
When Zombone has around half his health, He uses a Sp attack “Scream” which is a debuff skill that lowers your attack and defense. Have Toadstool use Group hug to remove all status effects from the party and continue attacking Zombone.
When Zombone has around 300 health left, he raises his speed and attacks you relentlessly with basic attacks. When this happens, have the party deal timed hits while Toadstool heals the party when her turn comes. After 2 to 3 turns, Zombone dies and ends the fight.
After defeating Zombone, Head towards the exit located at the top right corner of the Boss Lair.
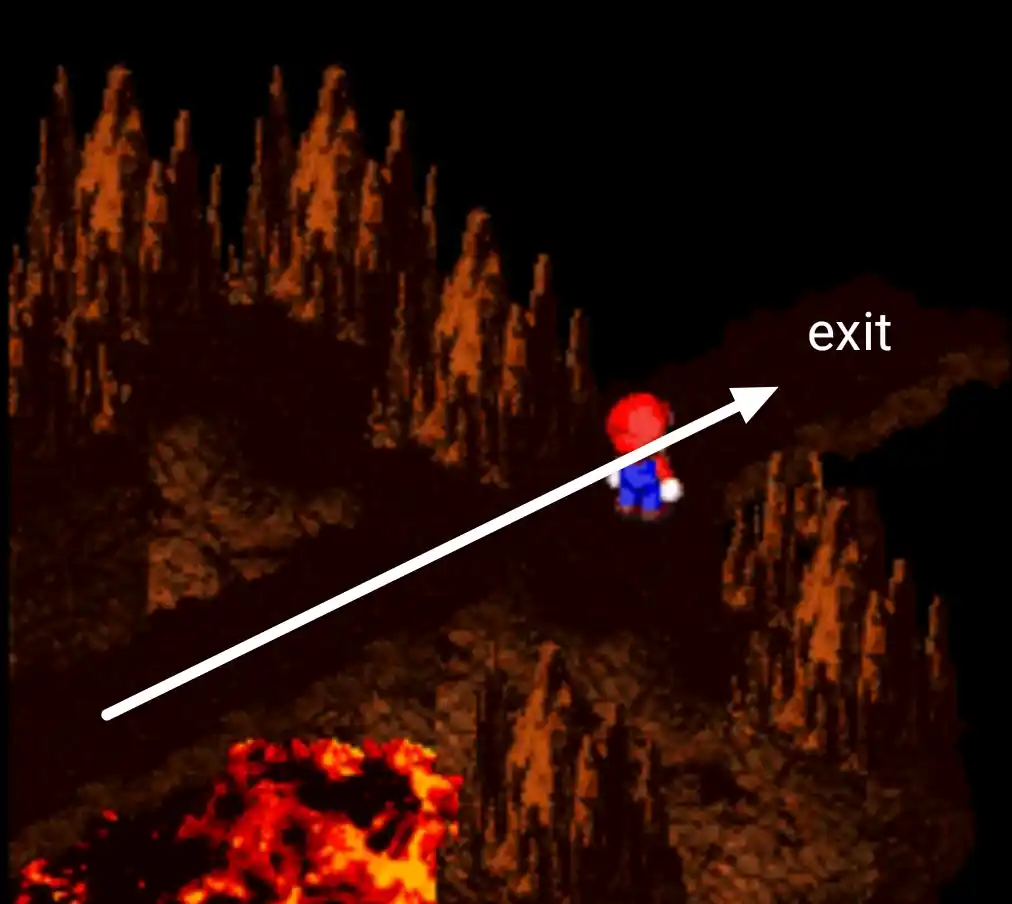
Area 21 (Star Piece and Axem Rangers)
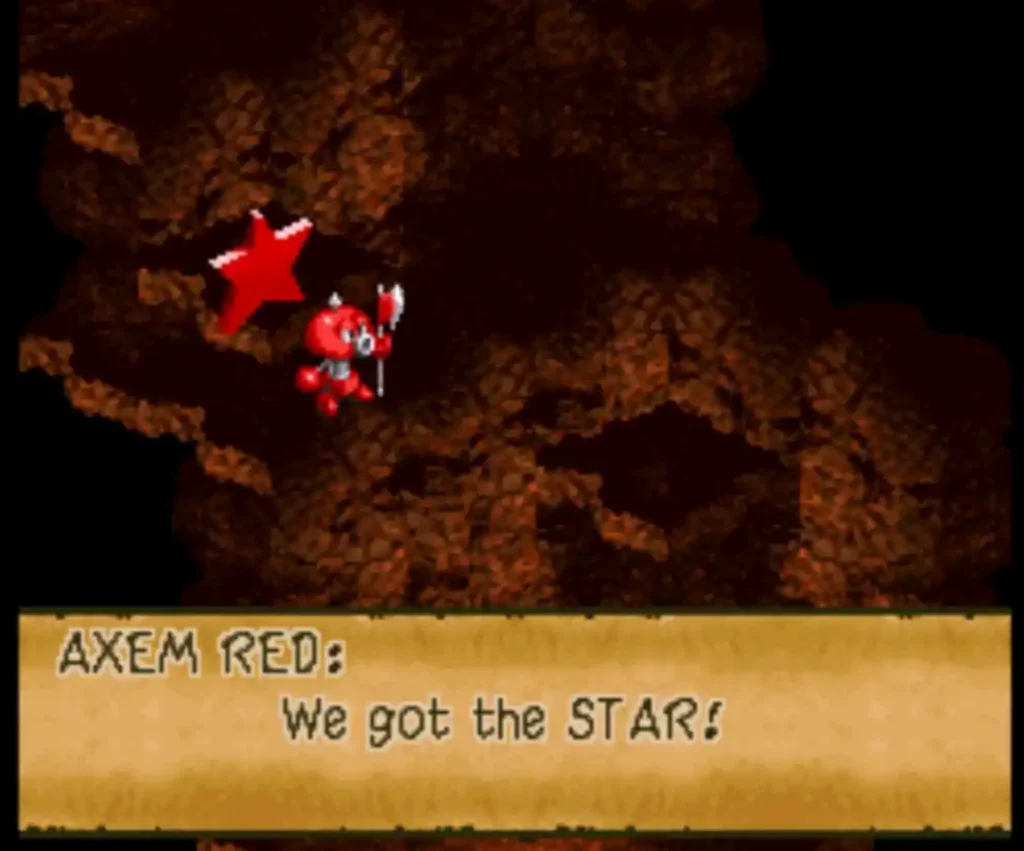
In the next area, a cutscene plays where the star piece floats in the air while Mario holds up his hands to receive it. However, The Star Piece is quickly snatched by the Axem Rangers who introduces themselves and runs off with the star piece.
Chase the Axem rangers to retrieve the star piece by climbing up the platforms and head out towards the exit at the top of the room.
Area 22
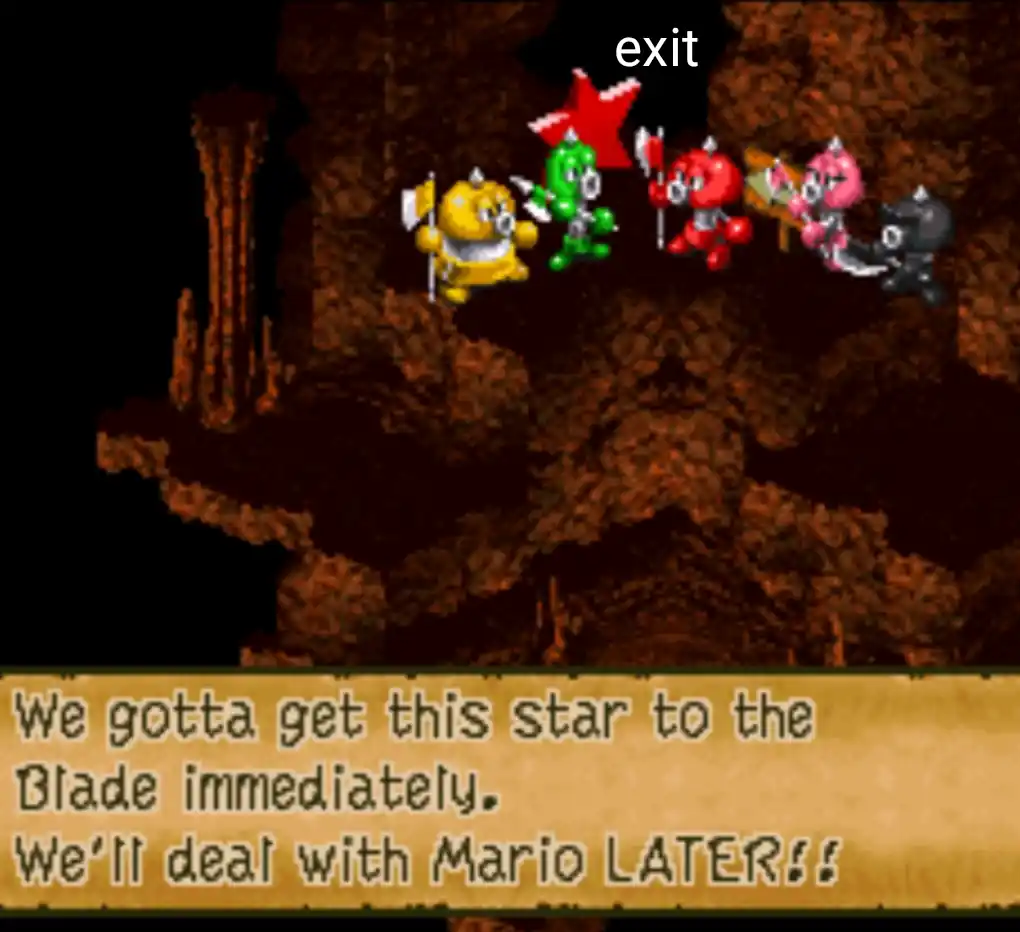
The next area shifts to a cutscene where the Axem rangers make fun of Mario. Axem Red tells the group that they should bring the Star Piece to Blade, their super robot and promises to deal with Mario afterwards. Head towards the exit after the cutscene ends to chase down the Axem rangers.
Area 23
The rangers will occasionally make an appearance while you climb up towards the exit in this area. Ignore them and make your way to the next areas.
Barrel Volcano exit
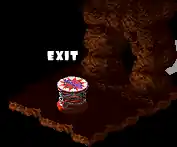
Eventually, You will reach a small room with a trampoline similar to the Barrel Volcano entrance. Hop on it to take you up the crater of the Volcano where the Axem Rangers and their Super Robot Blade will be waiting for you.
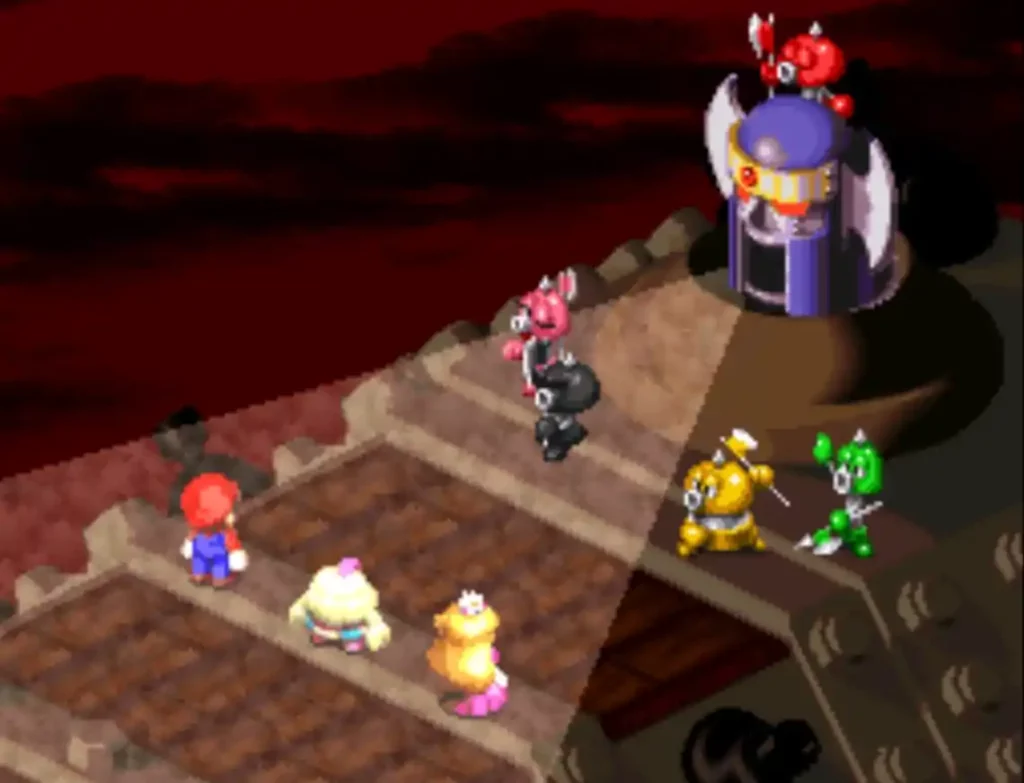
Boss fight Axem Rangers
| Name | Hitpoints | Attack | Gold coins | Experience | Weak | None |
| Axem pink | 400 | 120 | 0 | 10 | Fire | None |
| Axem black | 550 | 140 | 0 | 40 | Thunder | None |
| Axem red | 800 | 150 | 0 | 40 | Ice | None |
| Axem yellow | 600 | 170 | 0 | 40 | Jump | None |
| Axem green | 450 | 100 | 0 | 20 | Ice | None |
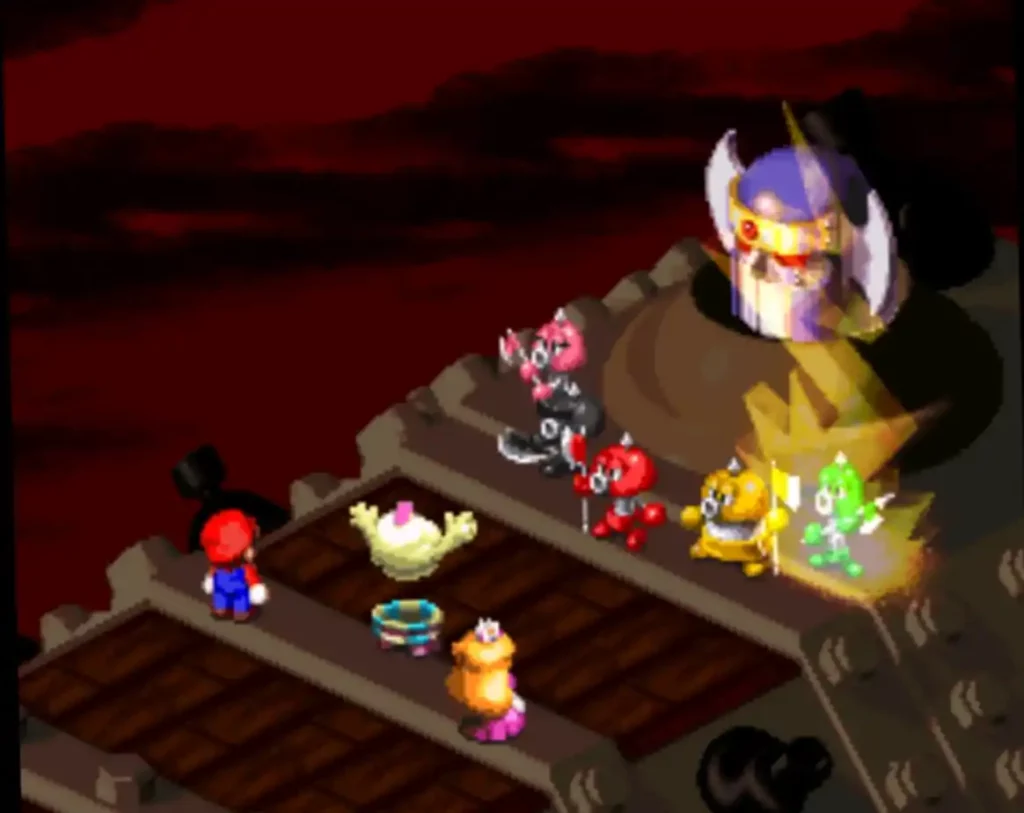
The Axem Rangers boss fight is unique among all the boss battles in Super Mario RPG because it features 5 Bosses (6 if you count Axem Red on top of Blade’s head at the final battle) that you fight at the same time.
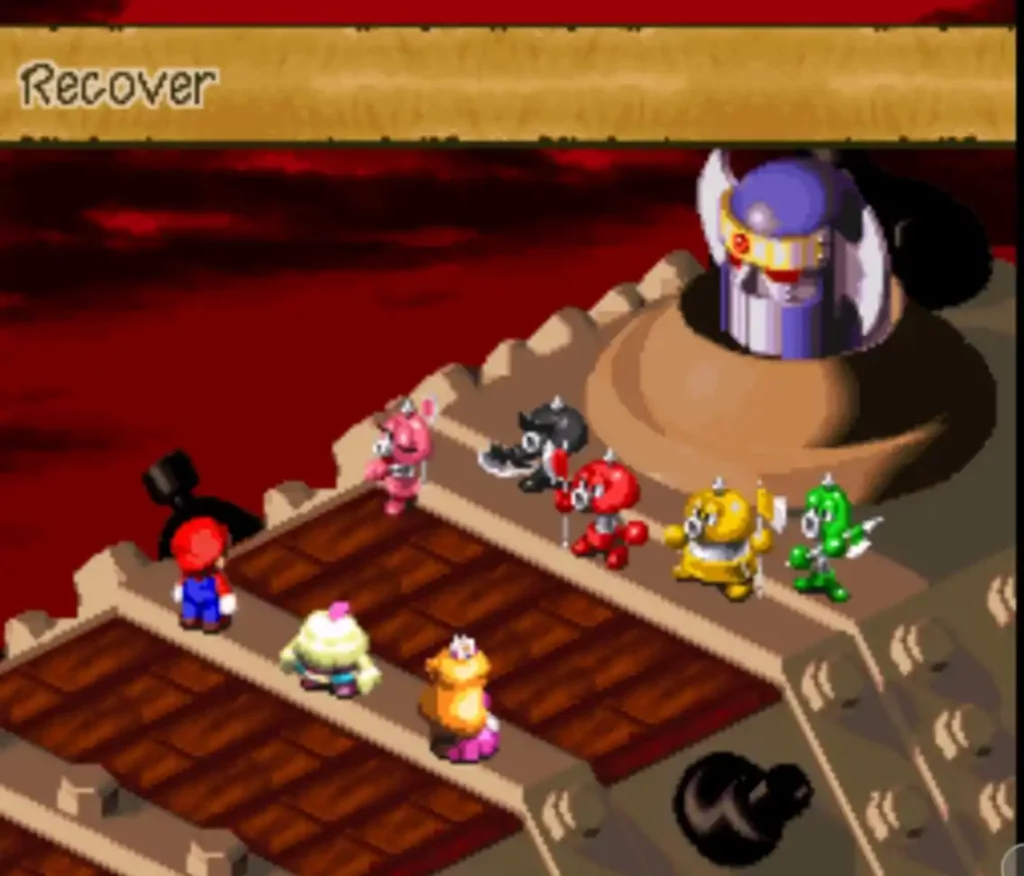
To keep things simple and easy for you to follow, We will focus on each Axem Rangers that you have to defeat first to make the fight easier starting with the ranger with the lowest Hitpoints up to the highest and lastly the final battle with Axem Red standing on top of Blade that delivers high AoE damage in the final battle.
Axem Pink
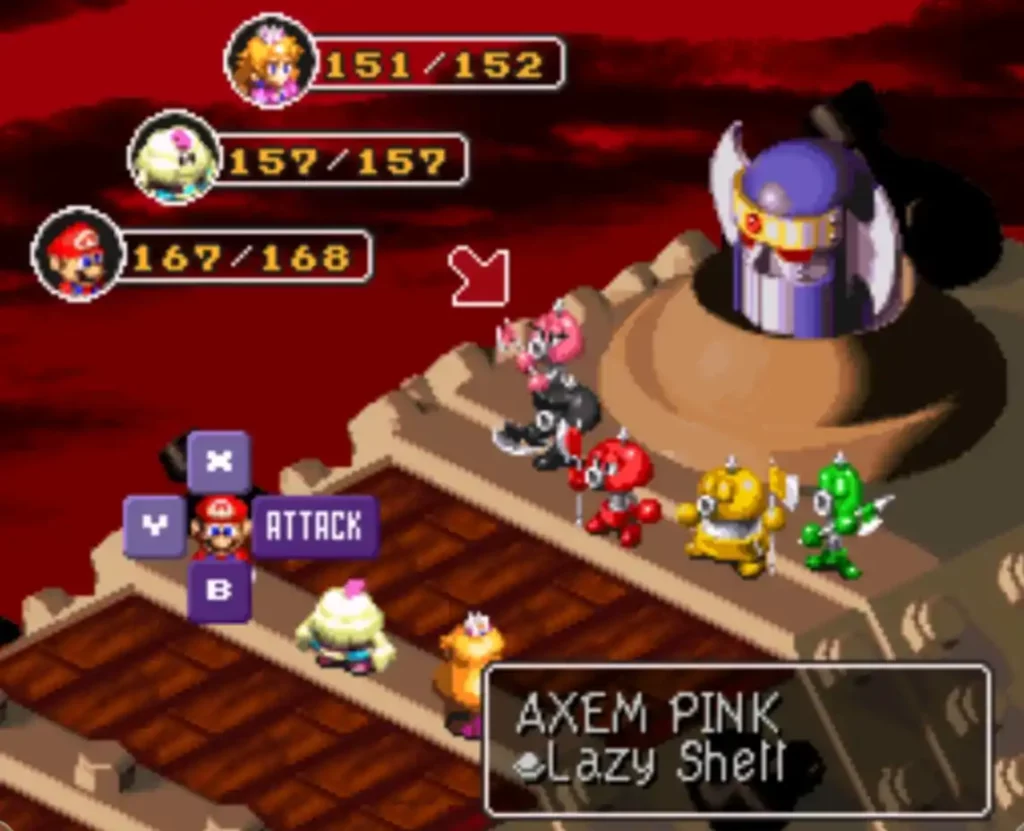
Axem Pink stands as the support for the whole party. She doesn’t deal high damage but can be a nightmare when left alone due to her Recover skill that heals her party. You should deal with her first by having the party focus on timed hits at the start of the turn. It usually takes around 1 or 2 hits to finish her off especially with the Lazy Shell weapon Mario uses. After defeating her, target Axem green next since he has the 2nd lowest Hitpoints in the group.
Axem Green
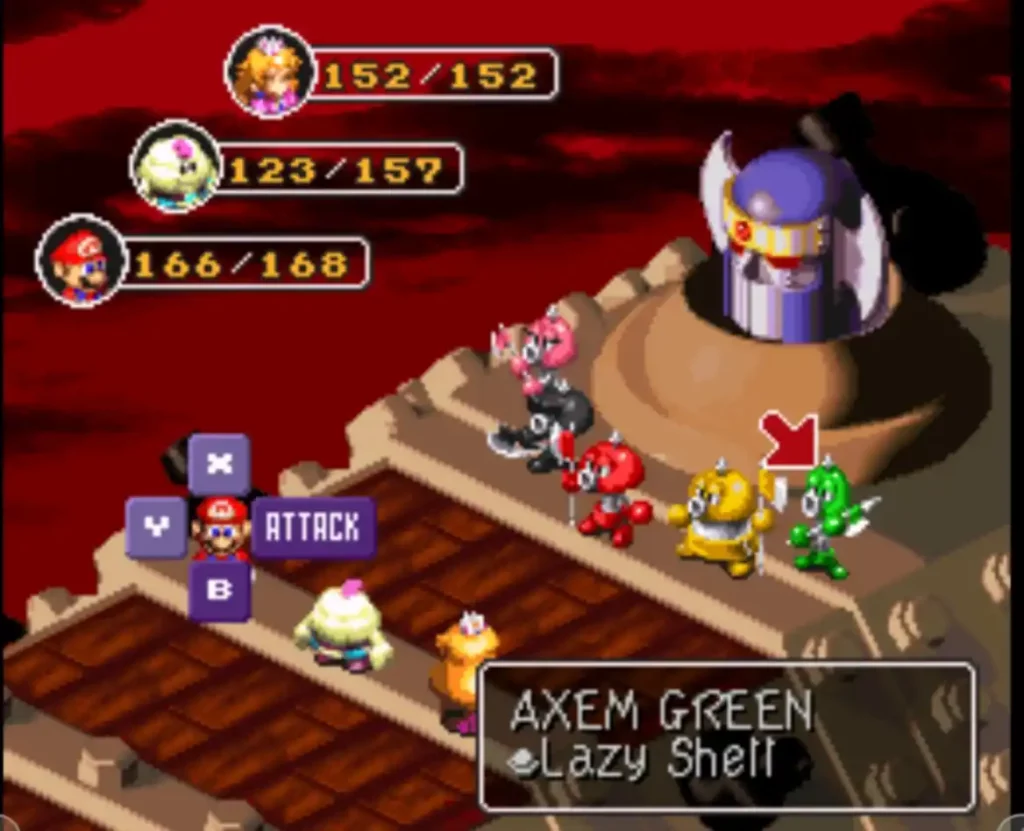
Axem Green deals elemental AoE earth and ice damage when he attacks. What makes him a tough opponent is his skill Elegy which disables Sp attacks and lowers your attack and defense stat.

You should take at least 2 able juice items with you just to be on the safe side and have Toadstool use the safety ring accessory to nullify status effects so she can continue healing and remove debuff even when hit by Elegy.
Have Mario use timed hits and the rest of the party use high single damage Sp attacks to deal with Axem Green. Mallow’s Shocker works really well and deals around 200 damage on Axem Green so use that skill when it’s Mallow’s turn to attack.
Axem Black

Among all the Axem Rangers, Axem Black is probably the one that poses the least threat. He uses bombs to attack and can easily be blocked or Dodged by tapping the A button before the attack hits. Have Mario deal timed hits and Mallow use Shocker to finish him off quickly.
Axem Yellow
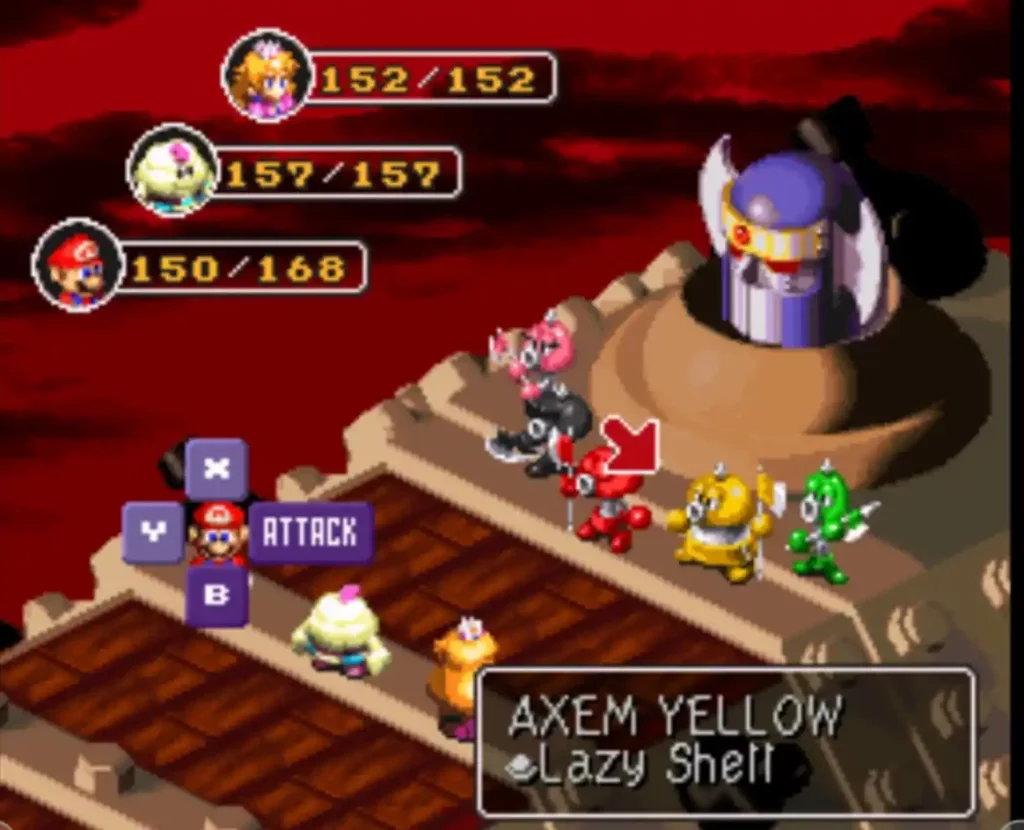
Axem Yellow can Nullify thunder and ice attacks. Have Mallow use timed hits on him instead while Toadstool heal the party in her turn. Axem Yellow uses water attacks and a high physical damage skill “Body Slam” which can deal high damage to Mallow if the skill connects so be careful. As soon as you finish off Axem Yellow, You can focus all of your attention to Axem Red.
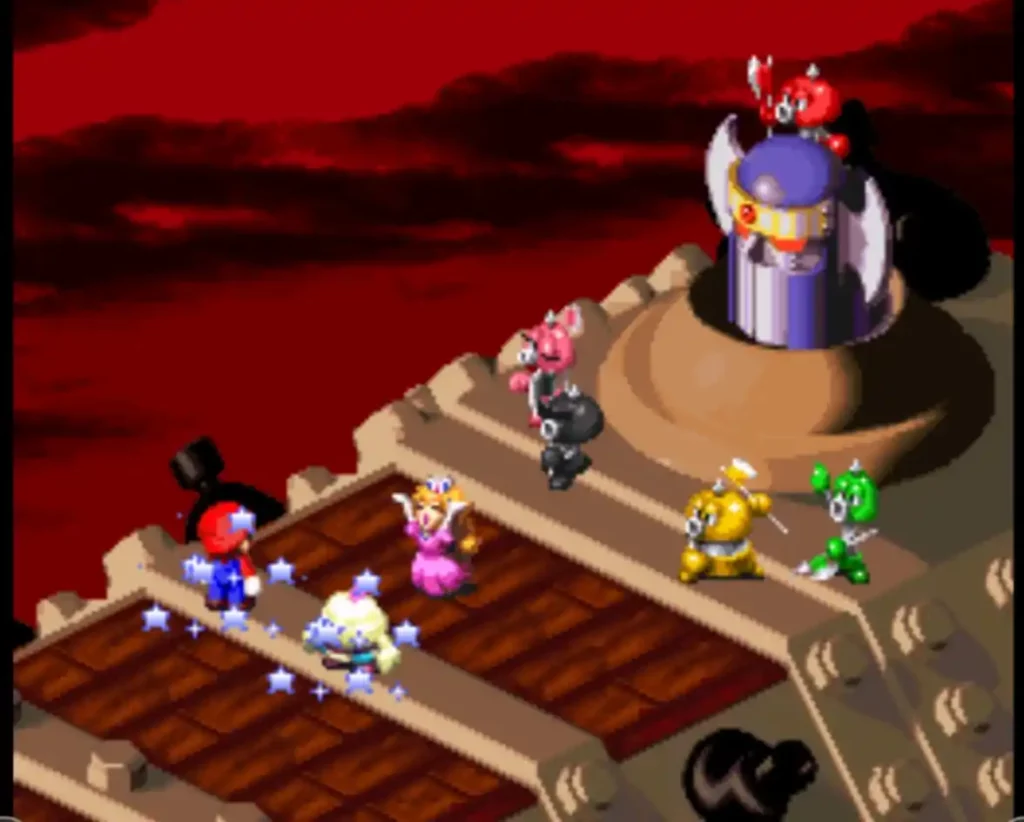
Axem Red
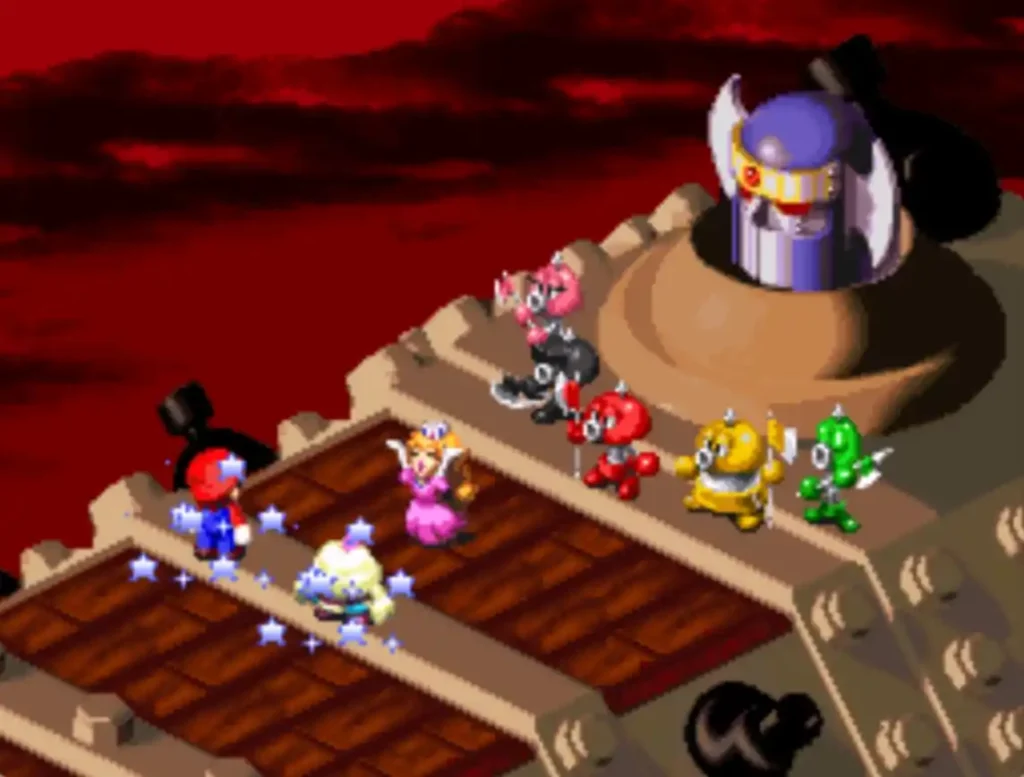
By this time, Axem Red would have finished casting Vigor Up which is a buff that boosts his physical and magic damage. Have Toadstool cast group hug to keep the party’s health up and remove any debuff you may have picked up in the previous fights and have Mario deal timed hits with Mallow following up with Shocker.

With vigor up being cast, Axem Red will only use Physical attacks which can easily be blocked with timed defense so have the whole party focus on attacking him until he has around half his total Hitpoints gone. As soon as his Hitpoints drop to half, He stands on top of Blade and fights together with the robot head for the final battle.
Breaker Beam
The Axem rangers can now use their ultimate attack Breaker Beam that deals high AoE damage to the party.
Have Toadstool use Group Hug every time the attack hits to keep your health up and revive any party member that gets killed by the attack.
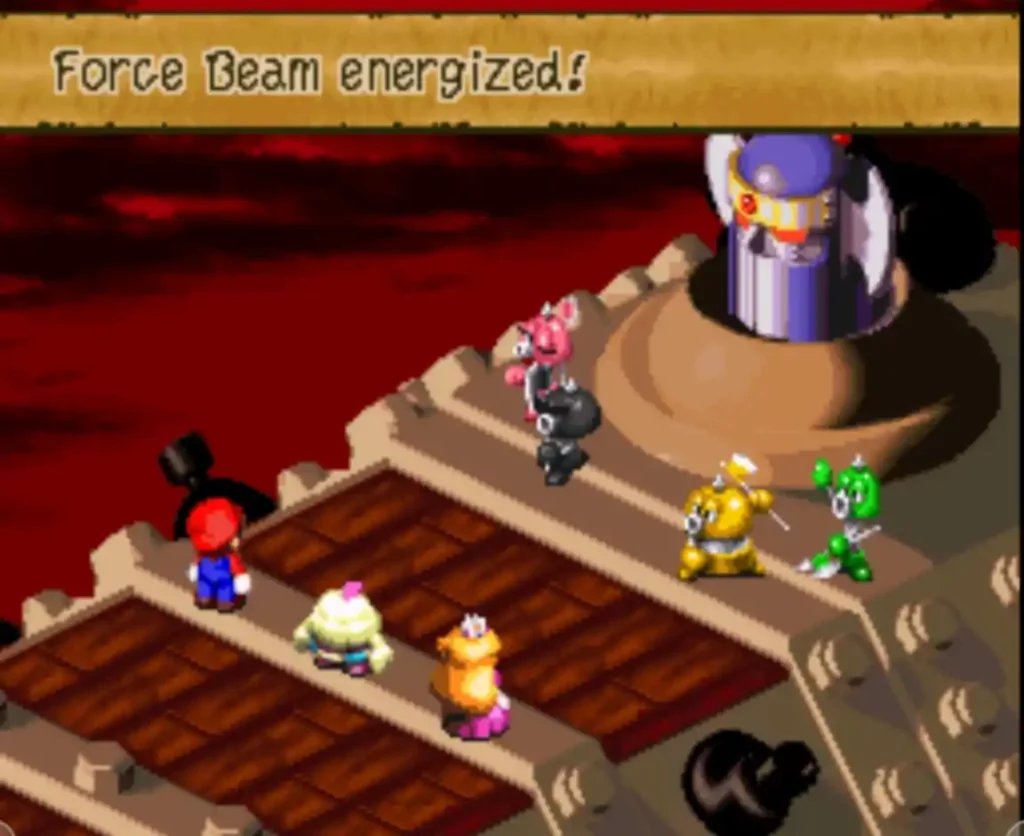
If you get killed often when the Breaker Beam is used, have your healer defend before the ultimate attack is unleashed. It takes 1 turn for the Breaker Beam to recharge and once you see the text that the Beam has been energized, have your party defend then let Mario deal timed hits afterwards while Toadstool heals the party to full health.
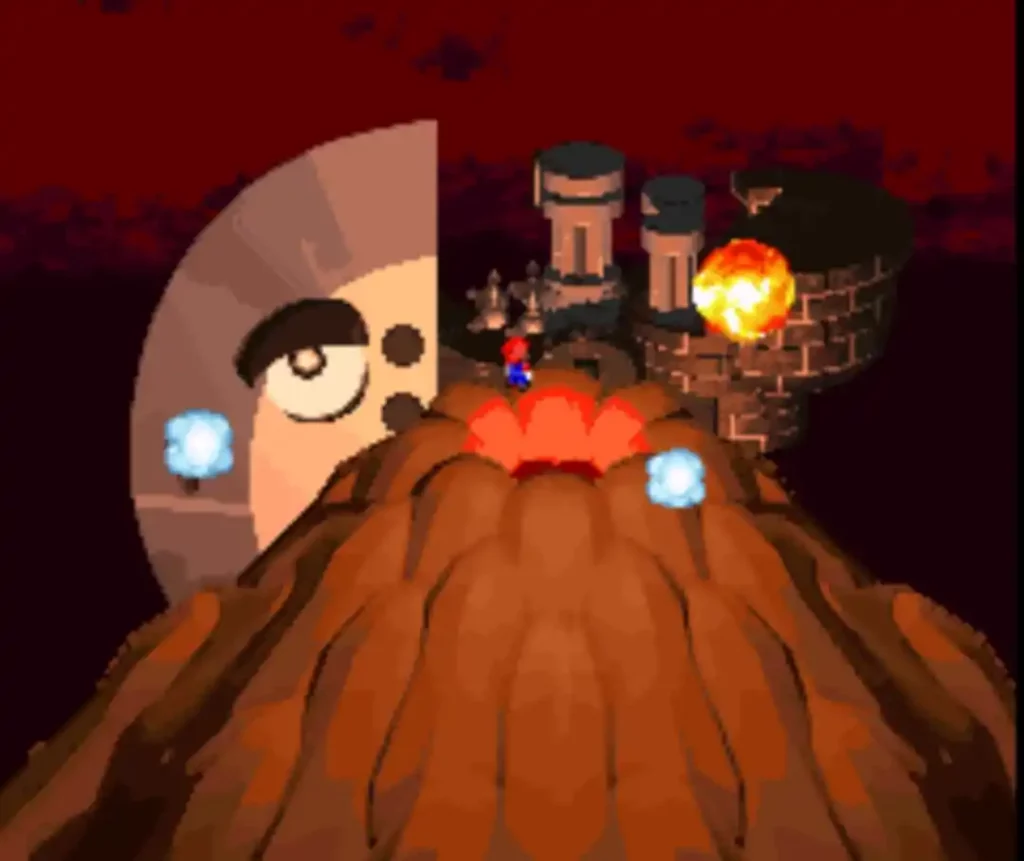
After defeating the Axem Rangers, Mario and his party jump off the super robot ship and land back at the volcano crater where a cutscene shows the ship exploding.
The 6th Star Piece
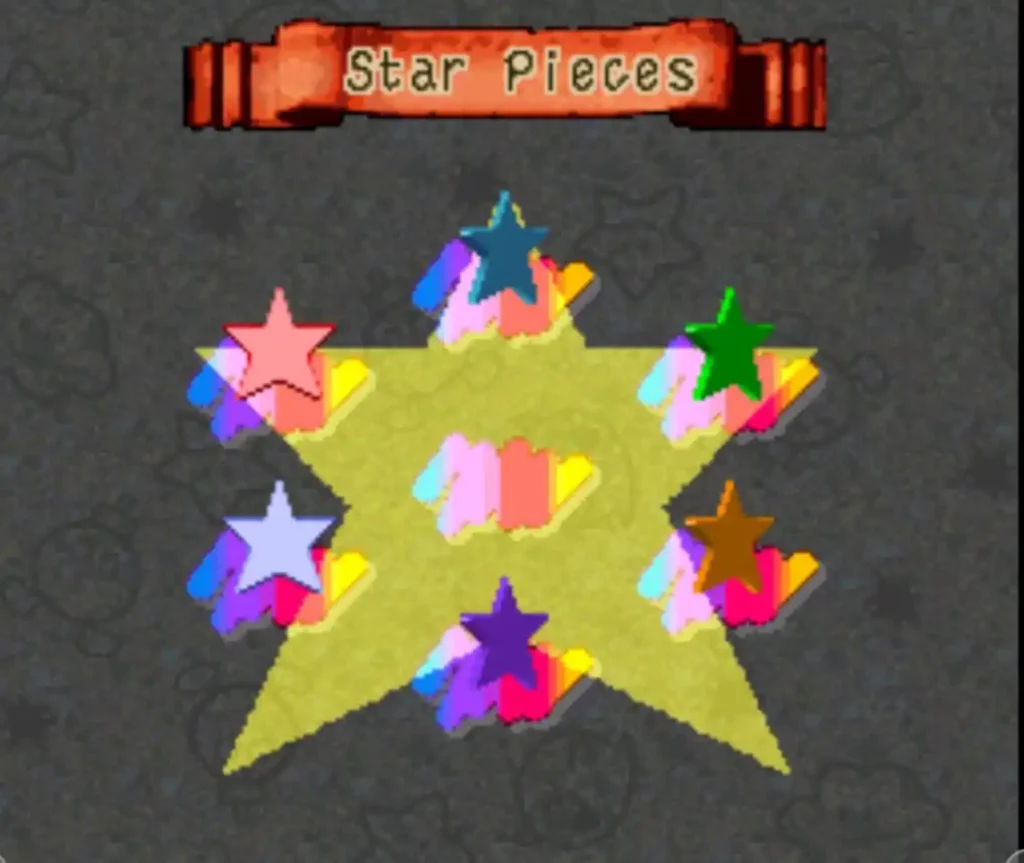
A cutscene will then play where Mario gets the 6th Star Piece and finishes the quest. After keeping the star piece in your inventory, the party exits Barrel Volcano and make their way back to Nimbus Land to report back to the King and Queen.